Overview
The Facebook pixel is one of the most powerful tools for optimising your Facebook ad campaigns and ensuring that they are successful.
With the Facebook pixel, you’ll be able to track your entire campaign from start to finish, and collect crucial data that will help you make strategic decisions and improve campaign performance.
You can even use the pixel to build your very own warm audiences to market to in future. (Instead of marketing to the cold market.)
Unfortunately, many business owners and marketers do not know how to set them up properly and fully utilize the features to improve their performance.
In this blueprint, we’ll be showing you how to set-up your Facebook Pixel properly.
You’ll also discover the best practices for creating and using standard and custom events, as well as custom conversions to collect crucial campaign data and significantly increase your overall ROI.
How Can You Use This?
- You will learn what a Facebook pixel is and how to set it up.
- You can use the pixels to collect crucial campaign data, build your own audiences, and increase your overall ROI.
- You can see if there are targeting options and other data that you are not taking advantage of at the moment, and might be missing out.
Tools And Resources
Setting up your Facebook pixel properly and using it to improve your campaign performance can be confusing, especially if you are not a technical person.
This is why we created this blueprint as a straightforward step by step guide to help you get started on the set up.
What You Need To Know
The Facebook Pixel is a piece of code that you place on your web pages.
It collects data from users who visited your website after seeing your Facebook ads.
The pixel can send information such as website visits, add to carts, purchases and even your own custom events back to Facebook.
It can also attribute the traffic source down to the device type that your ad was viewed on.
This data allows the Facebook algorithm to optimise and help your ads reach the right type of audience that will be more likely click on your ad.
However, the caveat here is that visitors must be concurrently logged into their Facebook account while they are visiting your pages.
On top of that, you must have set up the pixel properly, so Facebook can receive the correct data and optimise the campaigns properly.
There are 2 main types of data that Facebook Pixels can send – Pageview data and Event data.
So, what are these two data types and why are they important?
Pageviews
The Facebook pixel can help you determine who visited your site, what they did on your website and when they visited.
Think of it as having a sticker on your web page – Every time someone lands on that page, they paste a sticker on it, and the data gets sent back to Facebook so you know that 1 person has visited that page.
This information will be useful to help you understand user behaviour and how to adapt your marketing accordingly.
For example, if you’re not getting enough views on a page – You know that your ad campaign needs to be improved.
Or, if you’re getting a ton of views on a page, you’ll have the confidence to spend more marketing dollars running more traffic to that page.
However, there is a limitation to the types of data that pageviews can collect.
The good news is that we can overcome this by using events to collect the other types of data.
Events
Events can record data that pageviews can’t.
They are actions that happen on your website (like when someone makes a purchase).
To track an event, you’ll need to place an extra small piece of code on your website to help Facebook understand that someone has taken a specific action.
Some examples of events are content views, purchases, add to carts and link clicks.
Facebook campaigns run on data.
The more data that you provide Facebook with, the better they can optimise to find the right type of audience for your campaign to succeed, saving you marketing dollars in the long run.
On top of that, with more data, you can make better decisions for your campaign.
This data will make a huge impact for your business. Without the Facebook Pixel, we’d all just be spending marketing dollars blindly, without any idea if our campaigns are working well or failing.
This is how Facebook has become such a powerful advertising platform in recent years – Because of the detailed, powerful data that their pixel gives you.
This is why it is crucial that you ensure that you set up your Facebook pixel properly.
There are 3 main purposes of the Facebook pixel – audience building, tracking and optimisation.
Lets jump into them and see what we can do with them.
Audience Building (Retargeting)
Facebook pixels allows you to track every action that a visitor takes on your page.
This means that you can collect your audience’s data and categorise them based on their activity. You can then retarget this group of visitors with a targeted offer. It’s a great way to build your own warm audience.
For example, if you sell a product, you may notice that visitors are going to your product page and adding products to their cart.
However, you notice that many of them abandon their carts and don’t make it to the purchase completion page (i.e. thank you page).
What you can do is to retarget this group of people with a specific offer like a discount.
As a result, some visitors who were undecided earlier may now buy your product, increasing your sales.
Just to clarify, you won’t be able to have the individual data of a specific person. However, you can retarget a group of website visitors based on their common behaviour. (E.g abandoning cart.)
Audience Building (Lookalike Audiences)
Another way you can utilise the Facebook pixel is for creating Lookalike Audiences.
A Lookalike Audience is a way to reach new people who are likely to be interested in your business because they’re similar to your best existing customers.
Basically, you can tell Facebook to use their algorithm and “guess” the next 1% to 10% of your audience population who have similar characteristics and data to your source audience.
You can then use this audience for your targeting in your Facebook campaign.
(Note: You’ll need at least 1,000 data points (or data from 1,000 purchase) for the lookalike audience to be accurate. If you have more data points, even better.)
If you want to learn more about how to create Lookalike Audiences and how to use them you can refer to our ‘Facebook Laser Targeting Guide’ blueprint.
Tracking And Decision Making
The Facebook pixel can track the exact actions people take on your website after they saw and click on your ads on Facebook.
Using the Facebook pixel, you can track exactly which Facebook ad led to a conversion on your page.
For example, if you have 3 ad sets running with 2 ads each, and each ad has the same goal of sending the Facebook user to your website to buy your product.
After a few days, you generated 7 leads and 1 purchase. Your Facebook will show that there are 8 conversions.
Using the Facebook pixel, you can track how many leads or purchases were generated from a particular ad.
This will help you to decide on how you should redistribute your ad budget – more ad budget for the working ad / audience and lesser for the rest.
Optimisation
When you create a new campaign on Facebook, you will select a ‘campaign objective’ so that the Facebook algorithm knows the goal that you are trying to achieve for that campaign and will optimise for it.
With the Facebook pixel, you can set a specific website conversion or event that you want to optimise for.
For example, imagine that you are running a campaign using the ‘conversions’ objective and you want Facebook to optimise for purchases.
This means that you want Facebook to show your ads to people who are more likely to buy your product.
So everytime there is a purchase on your website, the Facebook pixel collects this data and sends it back to Facebook.
The Facebook algorithm will then analyse this data and use it to find similar audiences who are more likely to buy your product.
As a result, your targeting gets better after every purchase on your website thanks to the data that the Facebook pixel is sending back to Facebook for optimisation.
This is also known as “training” your pixel.
How To Set Up Your Facebook Pixel?
For this section, if you have not set up your Facebook Business Manager account, please refer to our ‘How To Use Facebook Business Manager To Improve Your Ad Performance’ blueprint.
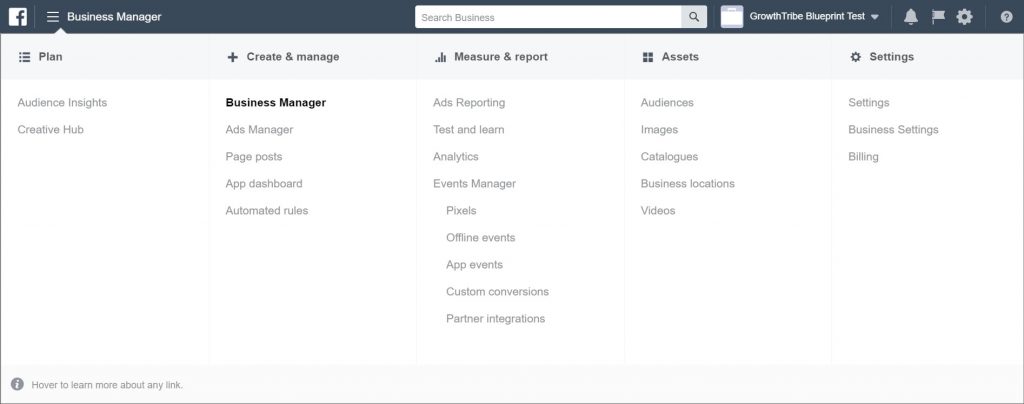
From your Business Manager dashboard, click ‘Business Settings’.
On the left side, under the ‘Data Sources’ header, click ‘Pixels’. Then click ‘Add’.
![]()
You can change the name of your pixel or stick with the one that is auto-generated. For example, in our case is ‘GrowthTribe Blueprint Test’s pixel’.
We recommend that you choose a name that represents your business as a whole. In our case, we created a new dummy page.
Note: You can only create 1 pixel per ad account.
Click ‘Create’.
![]()
You’ll see the pixel once you’ve successfully created it.
![]()
From your Business Manager dashboard, click ‘Pixels’ under Events Manager and you will see the pixels page.
![]()
Click ‘View Setup Instructions’ and window will pop up for you to set up your pixel.
For this blueprint, we’ll show you the second option.
Click on ‘Manually install the code yourself’.
![]()
You’ll see the window below, ‘Install pixel code’.
![]()
Scroll down and you’ll see ‘2 Copy the entire pixel code and paste it into the website header’.
![]()
Hover your mouse over the code and you’ll see the text box turn blue and an option to ‘Copy code to clipboard’.
![]()
Click on ‘Copy code to clipboard’ and the text box will turn green, indicating that the code has been copied to your clipboard.
![]()
Now go to your website’s backend platform and locate the header code to paste the pixel code.
This will be slightly different depending on the platform that you are using such as WordPress, ClickFunnels or other site builders like Wix.
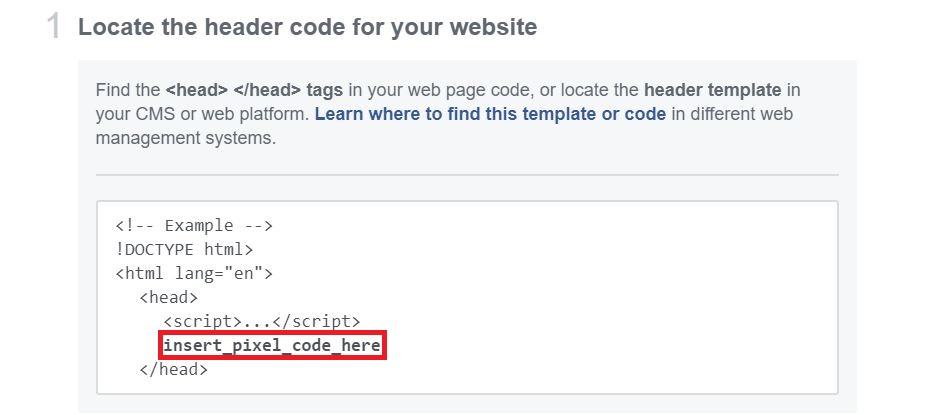
It’s important for you to install the pixel code in the page header as the header is always the first thing to load on a page.
This is crucial as you want the pixel to be the first thing that loads when a visitor visits your page, to ensure correct tracking.
Now that you’ve set up your Facebook pixel successfully, the next crucial step is to set up the events correctly.
This allows the pixel to track the actions that users take on your website correctly and send the right data back to Facebook.
The Facebook pixel ‘fires’ whenever an event occurs on your website.
There are two types of event that will cause a Facebook pixel to fire – Standard Events or Custom Events.
Standard Events
A standard event is a predefined set of events that corresponds to certain actions that users take on your website.
They update Facebook whenever a visitor takes a particular action on your website.
This data can be used to optimise your Facebook ads campaigns and provides more details for you to analyse in your Facebook reporting.
You can also use the Standard Events as website conversion points so Facebook can optimise for them.
There are 9 Standard Events that you can track using Facebook pixel.
For example, the 3 most common Standard Events are View Content, Purchase and Lead.
View Content
The Facebook pixel will fire every time a visitor views a particular page, like your product page, landing page or article.
Purchase
The Facebook pixel will fire whenever there are completions of the checkout process, such as the visitor landing on the ‘Thank You’ page or payment confirmation page.
Lead
The Facebook pixel will record an activity each time a visitor gives you their lead details on a page. This can be a form submission, signing up for a trial, or opt-ing in for your offer.
To see the other Standard Events, you can refer to this link for a list: https://www.facebook.com/business/help/402791146561655?helpref=faq_content
What Exactly Are Standard Events?
Basically, the standard events allow you to have different tags for different pages in your funnel, so that you know the user journey for each specific page.
They’re pretty much just tags.
You can use any of the standard events, as long as they correspond to the action you require your user to take.
Take the effort to use the right standard events so that your tracking is clear and you do not get confused in the long run.
For example, if you put the purchase event on your main landing page, then you’ll wonder why you’re getting tons of purchases tracked but no actual purchases. (Because it should be the view content event instead.)
Or the opposite can occur – If you don’t put the purchase event on your purchase confirmation page, you’ll lose out on the data.
Manual Installation
From your Business Manager dashboard, click ‘Pixels’ under Events Manager and you will see the pixels page.
Click ‘View Setup Instructions’ and window will pop up for you to set up your pixel.
![]()
Click ‘Continue’ and a you’ll see a window to add events to your pixel.
![]()
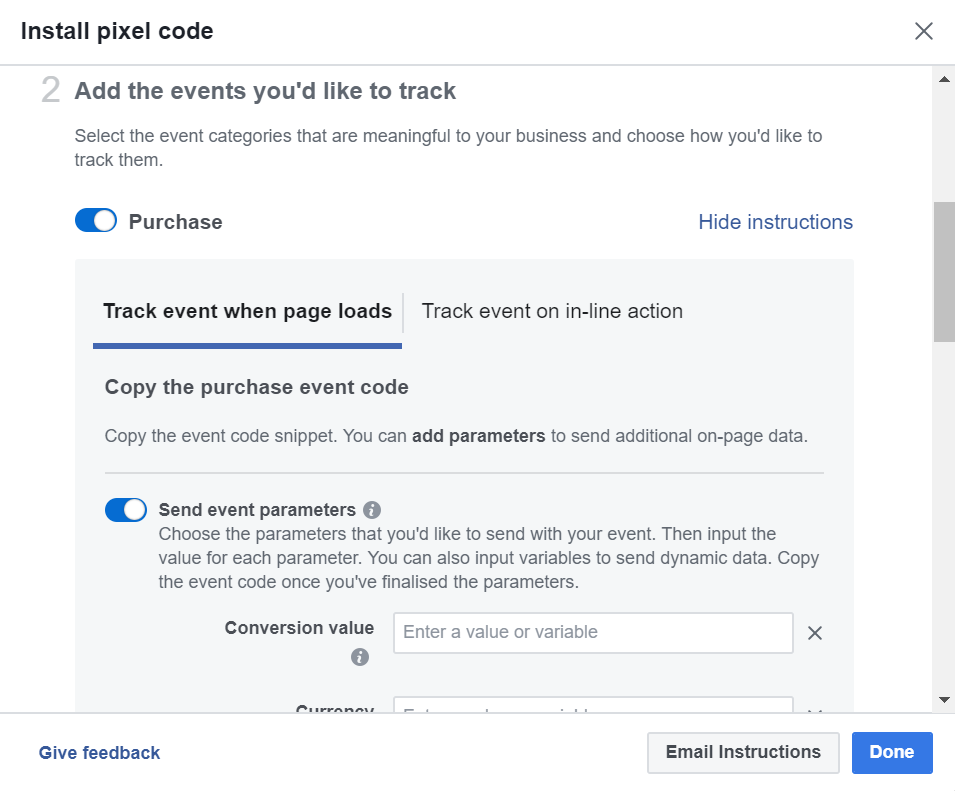
Scroll down and you can select the events that you want to track:
![]()
For example, if we click on ‘Purchase’, a drop down menu of instructions will appear.
If you scroll down further, you’ll see that you can enter the conversion value and currency.
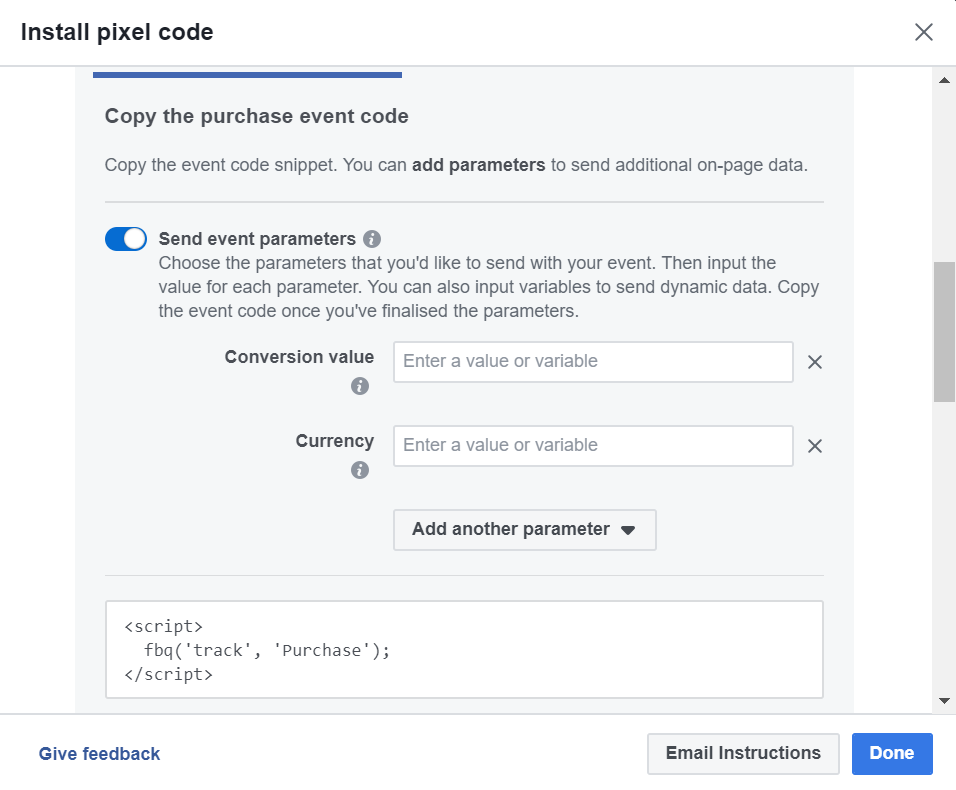
For example, if you are selling only 1 product that costs SGD 10, you can enter the values in the image below:
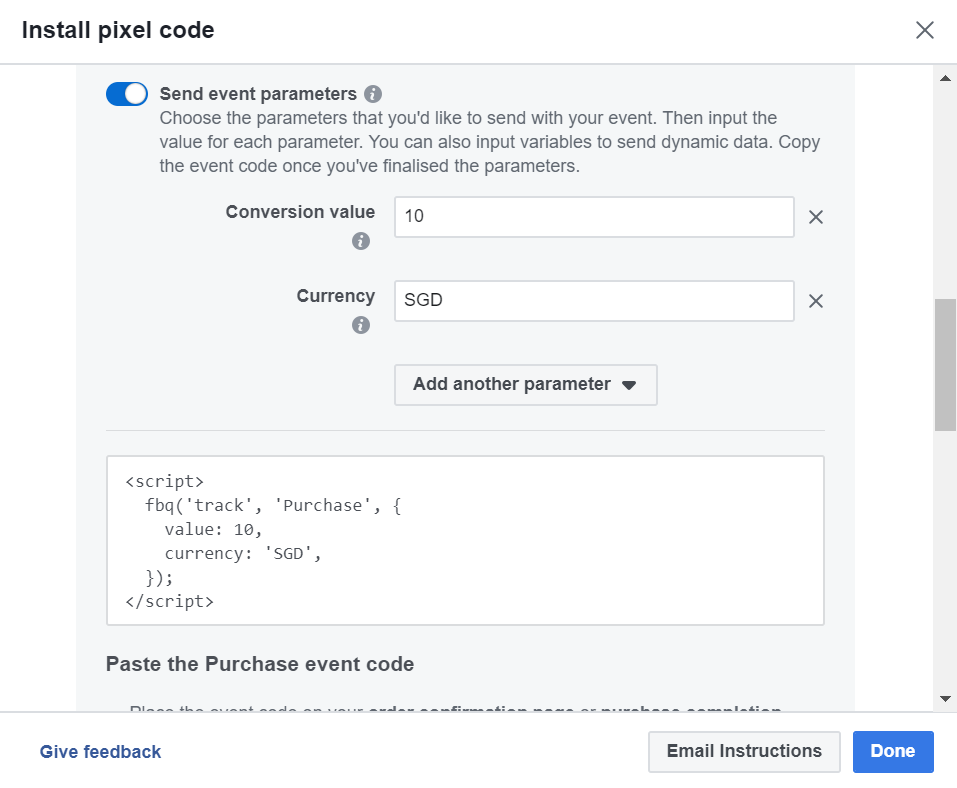
This means that every time there is a purchase of that product, the Facebook pixel will fire and send the data back to Facebook.
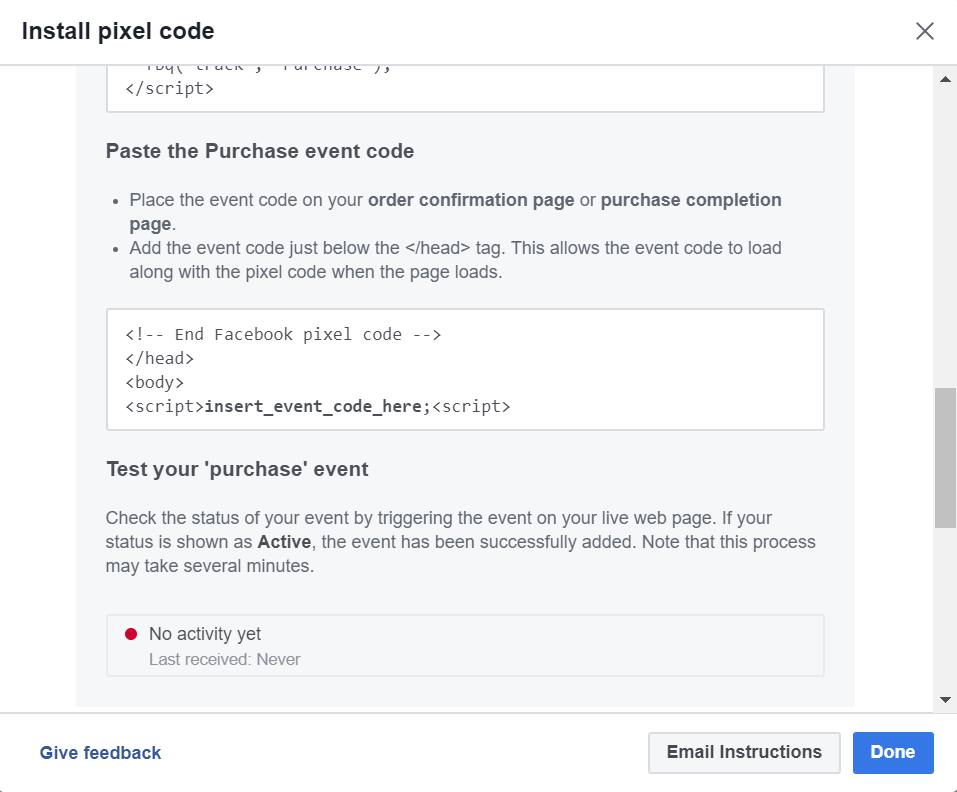
Since this is a Purchase event code, you will set up this Facebook pixel on either your order confirmation page or purchase completion page.
Now that you’ve set up your pixels with the event codes properly, it’s crucial to check that they are working properly and tracking what you want them to.
This ensures that the right data is being collected and sent to Facebook to optimise.
If your pixel doesn’t fire correctly, you’ll fail to collect the right data, and you’ll wonder why your numbers look wrong, or don’t make sense.
You can do this using Facebook Pixel Helper, a plugin for Chrome from Facebook.
After getting the event code for your pixel, when you scroll down in the same window, you will see an option to ‘Install Pixel Helper’.
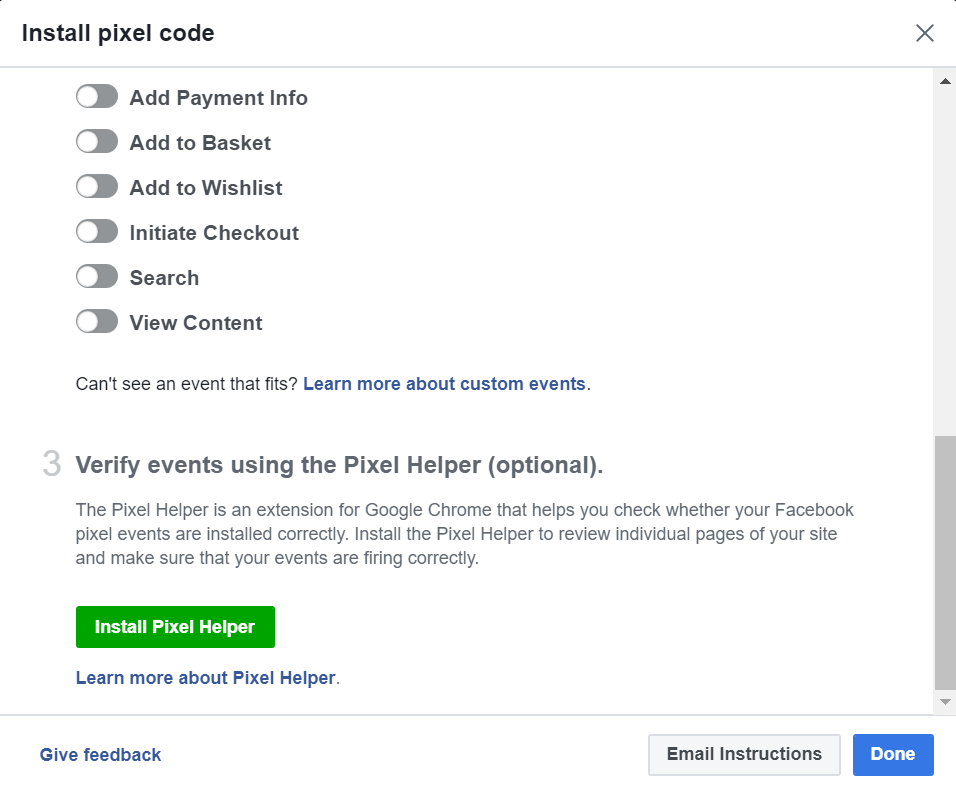
Click ‘Install Pixel Helper’ and a new tab will open for you to download it.
![]()
Click ‘Download Now’ and you will be redirected to the Chrome web store.
![]()
Click ‘ADD TO CHROME’.
![]()
Click ‘Add extension’. You’ll see that Facebook Pixel Helper has been added to your Chrome browser.
![]()
To check if your Facebook pixel is working, go to the page where you’ve installed it at.
Click on the Facebook Pixel Helper icon on your Chrome browser.
If the pixel, is properly installed, the Facebook Pixel Helper icon will be blue.
When you click it, you can see the pixel that was installed in that page, which in this case is the PageView pixel for our https://www.growthtribe.com website.
You’ll see a green tick beside your pixel event.
![]()
If the pixel does not fire correctly, instead of a green tick, you’ll see a red X.
If it is not properly installed, we recommend you re-set up your pixel again and re-test.
Custom Events
Custom Events are actions that fall outside those covered by Standard Events.
For example, if your funnel is so long that you have more than 9 events you want to track, custom events allow you to define your own actions for easier tracking.
Or, if you want to track a specific web page by the page name, you can set up a custom event for that specific web page.
This is done by using additional bits of code called parameters.
Compared to Standard Events, Custom Events are able to provide more detailed information in terms of giving additional context about a specific action taken.
This data will help Facebook to optimise better.
From your Business Manager dashboard, click ‘Pixels’ under Events Manager and you will see the pixels page.
![]()
Click on ‘Custom conversions’.
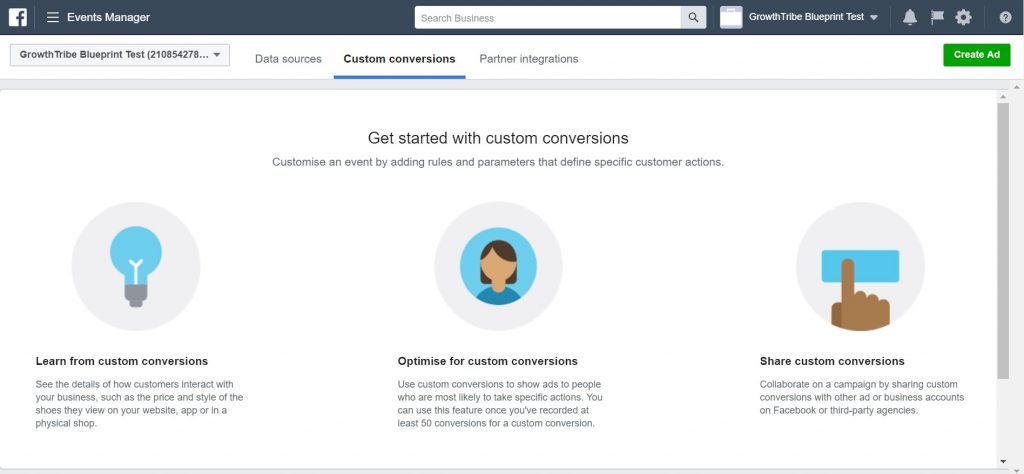
Scroll down then click ‘Create Custom Conversion’.
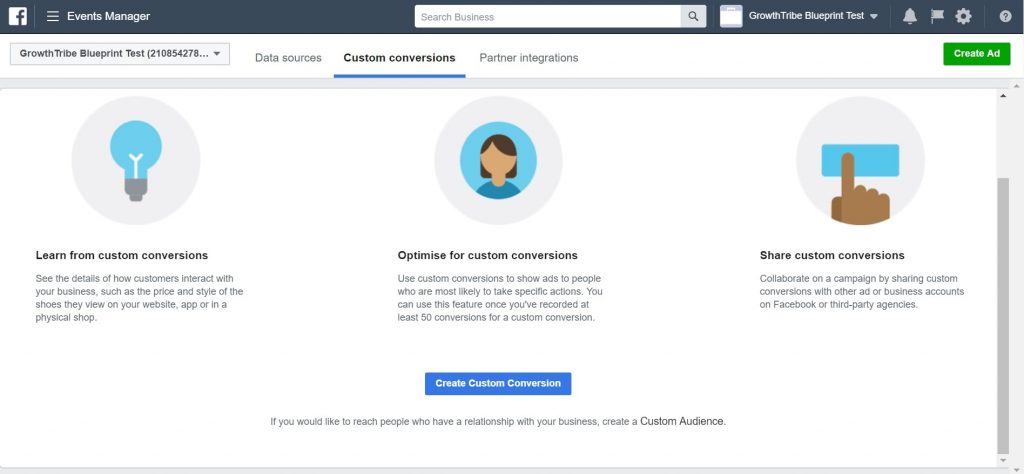
You’ll see a window to ‘Create a custom conversion’.
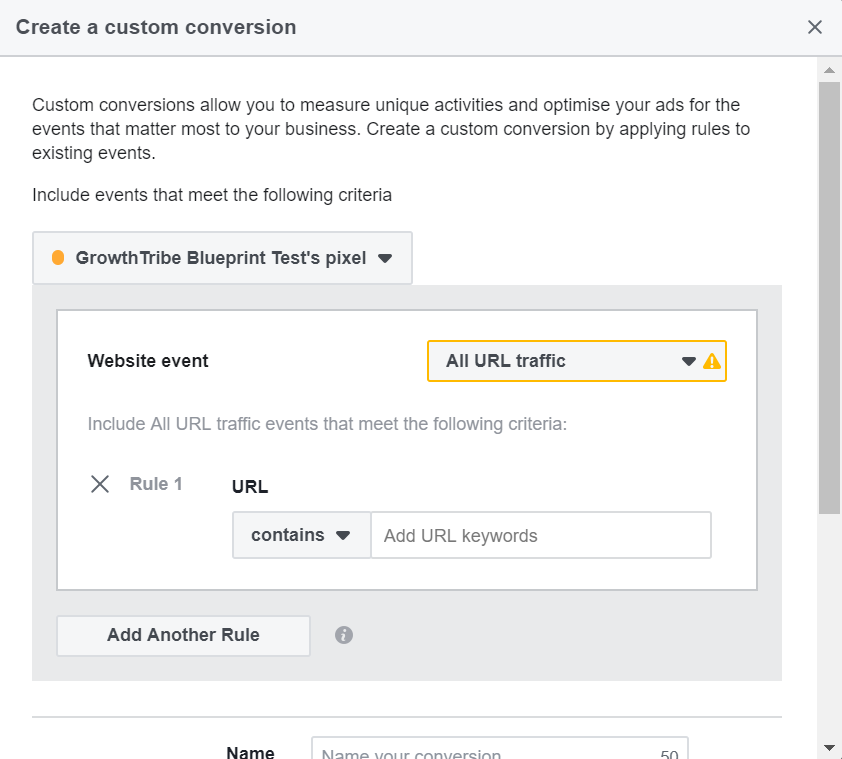
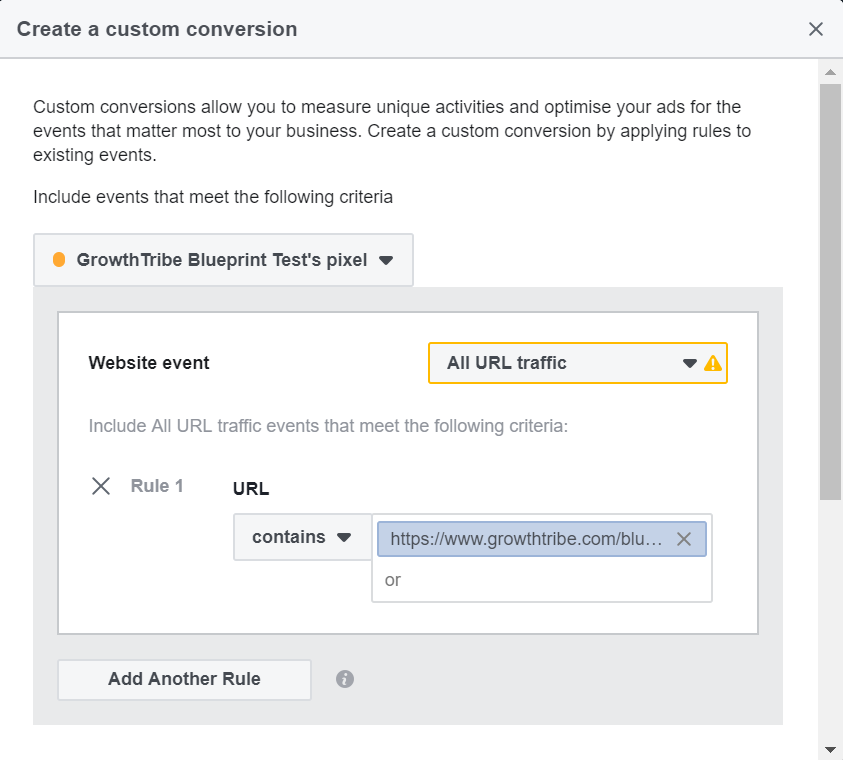
Enter the URL of the page that you want to add the custom event code on. In this case, the page that we are interested in is https://www.growthtribe.com/blueprint-home/.
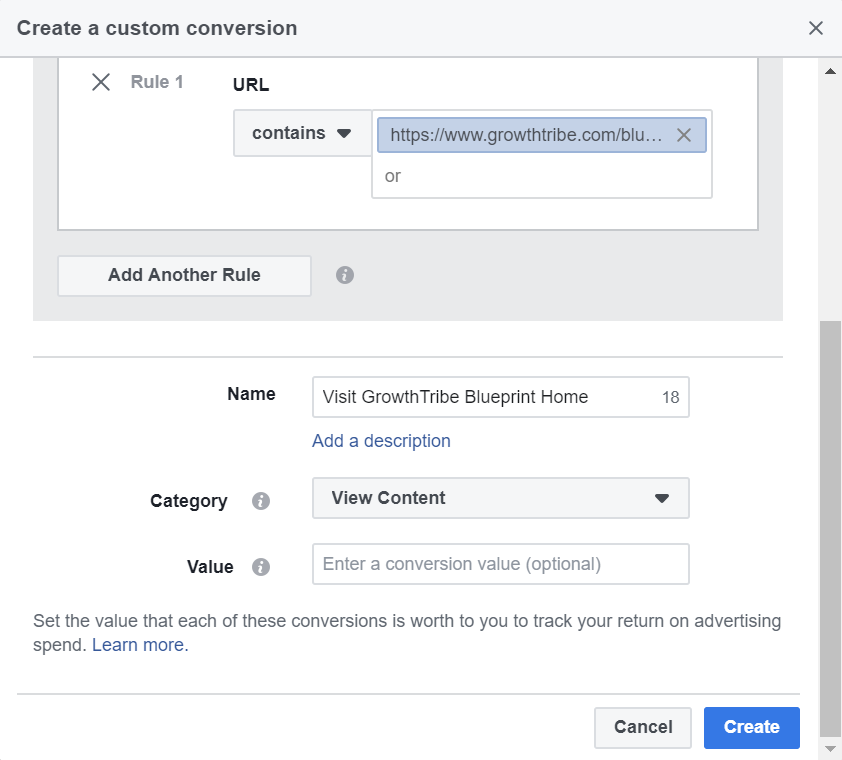
Select the category of event that you want to track and name your custom conversion.
In our example, we are interested to track how many people actually visited our blueprint homepage if we ran direct Facebook ads to this page.
So the category of the event is ‘View Content’, and we name this custom event ‘Visit GrowthTribe Blueprint Home’.
Click ‘Create’.
You’ll be notified that you’ve successfully created your custom event.
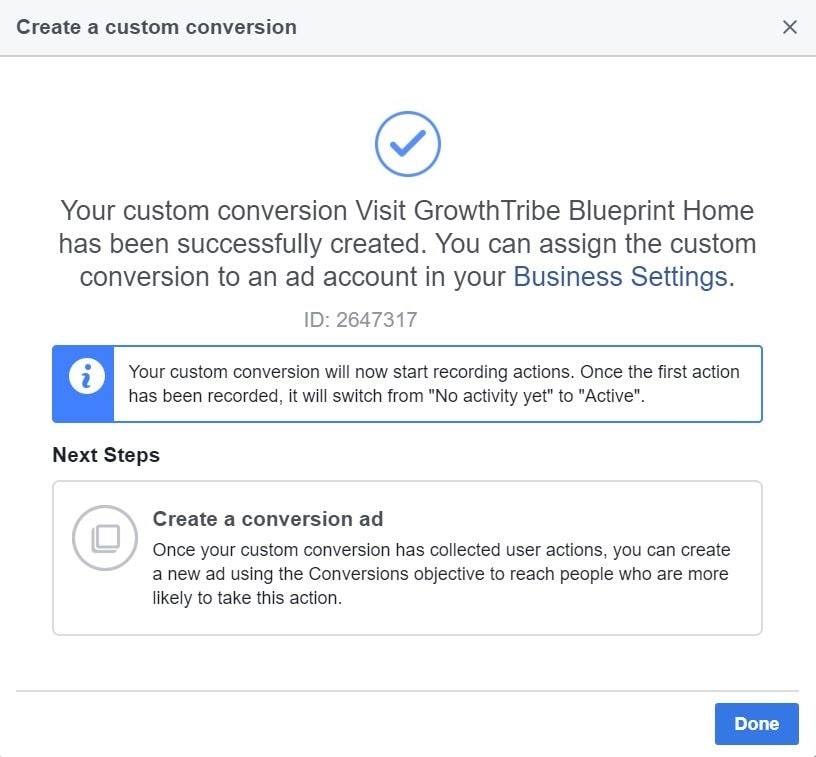
Now, in your ad campaign, you’ll be able to track for ‘Visit GrowthTribe Blueprint Home’. You’ll be able to see it as one of the column headers in your Ads Manager.
What’s Next?
Now that you know how to set up your Facebook pixel properly and use the data to your advantage, you will be able to do these 3 crucial things for your campaigns:
- Track your entire funnel to make sure that all your data is in the right place, and you have a clear idea of the numbers for each step of your campaign.
- Use these numbers to make strategic decisions for your campaigns, such as which ads are working well, which audiences are working well, and which pages you should run traffic to.
- Build your own audience, and have a system to continually remarket to this warm audience with targeted offers.
This will help you build a segmented marketing strategy to target your customers with specific offers and messages.
If you want to learn how to write different Facebook ads to market to the various audiences that you’ll build, you can check out our ‘How To Create Facebook Ads That Sell’ blueprint, ‘How To Create Attention Grabbing Ad Images’ blueprint and ‘How To Create An Irresistible Offer’ blueprint.
If you want to learn how to create landing pages that convert, you can check out our ‘How To Craft A High Converting Lead Capture Page’ blueprint.