
Overview
Facebook’s business manager is one of the most powerful tools for managing your Facebook marketing.
Unfortunately, many business owners and marketers do not know how to fully utilize the features to improve their performance.
In this blueprint, you will learn how to set up your Facebook Business manager properly.
You’ll also discover the best practices for managing your accounts and pages on Facebook and how and how to use Facebook Business manager to significantly increase your overall ROI.
How You Can Use This:
- Learn how to setup Facebook Business Manager for your business and your team.
- Learn how to use the advanced features in the Business Manager to improve your current campaign performance.
Tools And Resources
Setting up your Facebook Business Manager account is challenging especially when you are familiarising with a new platform.
This is why we created this blueprint to help you get started on your journey.
As a guide, we included a PDF version of the blueprint.
What You Need To Know
Facebook Business Manager is a free platform that helps advertisers manage their current Facebook marketing assets, teams and partners.
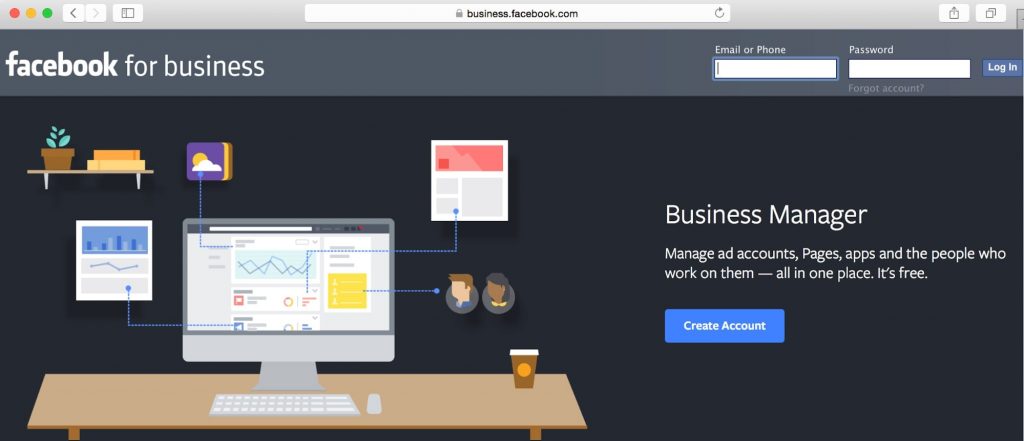
(Credit: Facebook)
With Facebook Business Manager, you can…
Create And Manage Multiple Assets
All of your assets such as a Facebook Page, Instagram account, audience list or product catalogue can be managed in one place. We’ll share more about how you can add and manage your assets within the business manager in the next section.
Control User Access And Permissions
You can grant different degree of access to your team, partner agencies and vendors, who work on your ad accounts, Pages and apps. The best part? You can do this while maintaining full ownership and control of all your assets.
Track Your Campaigns & Ads
You can monitor campaigns on Facebook and Instagram more efficiently using overviews and detailed views of your ads performance.
Facebook Ads Manager is simply an ad management tool. You can use it to create, manage and track ads of a specific campaign.
You can access Ads Manager through your ad account on Business Manager.
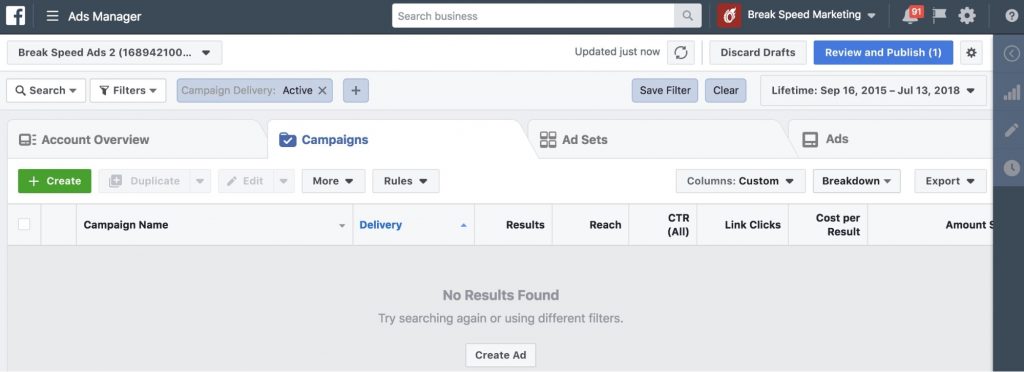
(Credit: Facebook)
It’s important to note that each ad account has its own setting that might not be the same as the settings set in the business manager.
How To Setup Your Business Manager From Start To Finish?
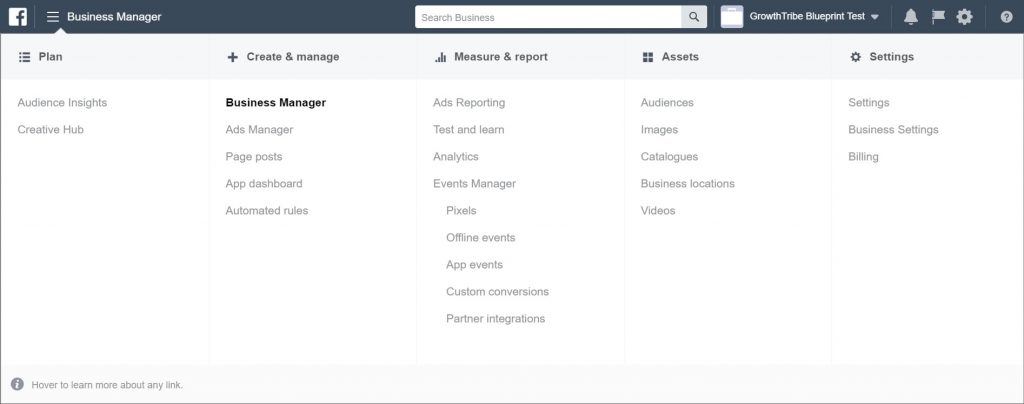
Go to https://business.facebook.com/overview.
(Credit: Facebook)
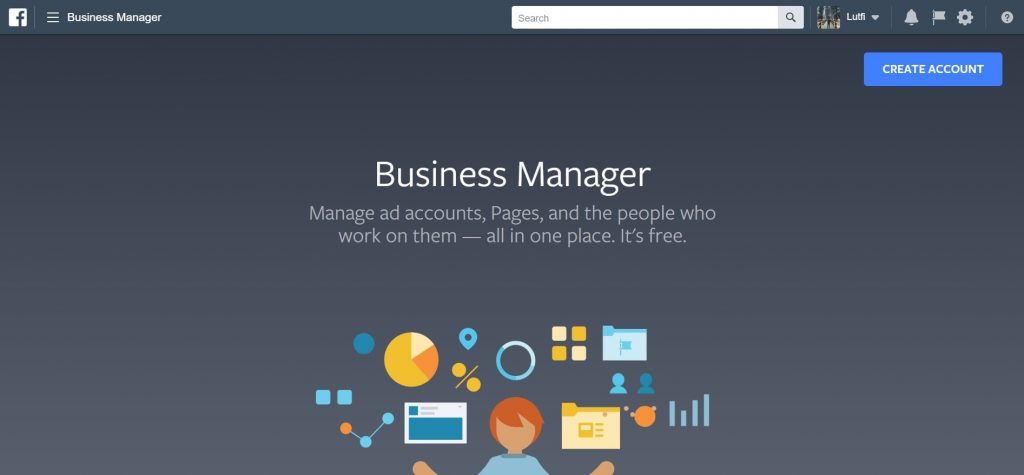
Click the ‘Create Account’ button.
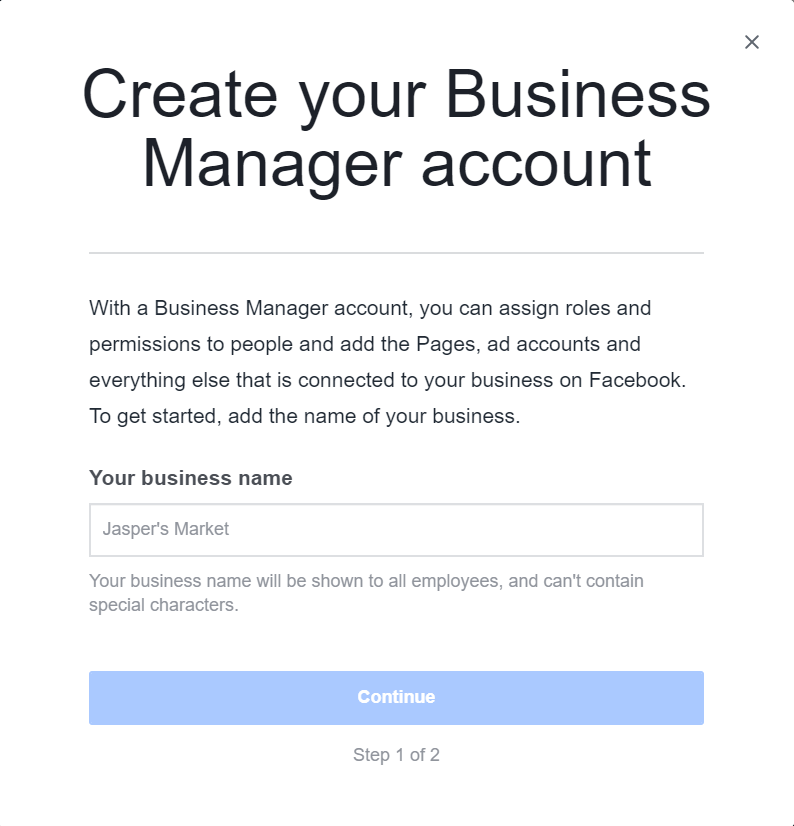
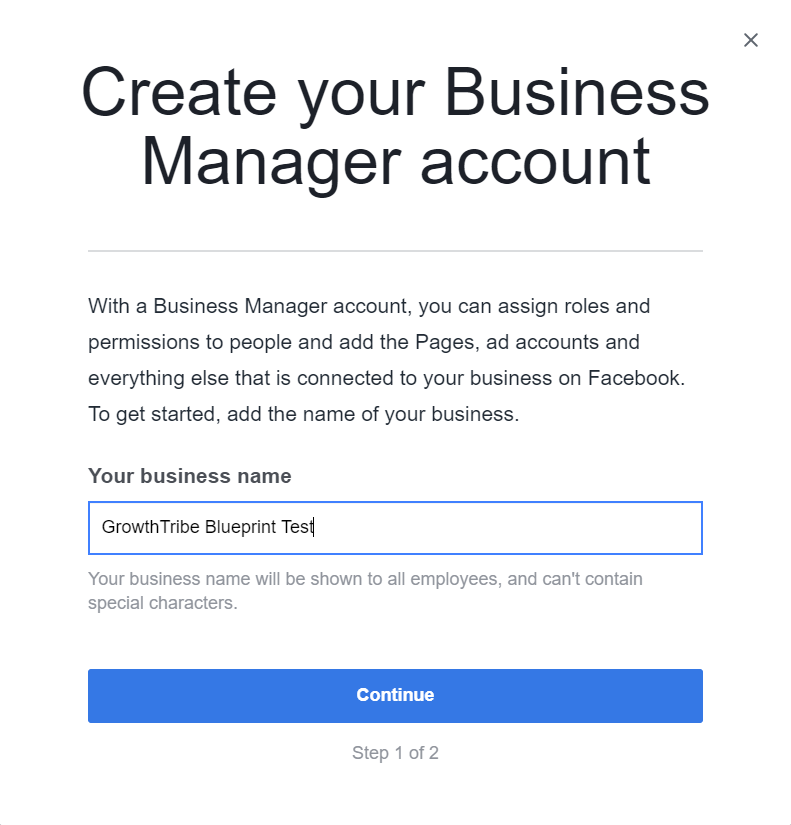
Enter your business name then click continue.
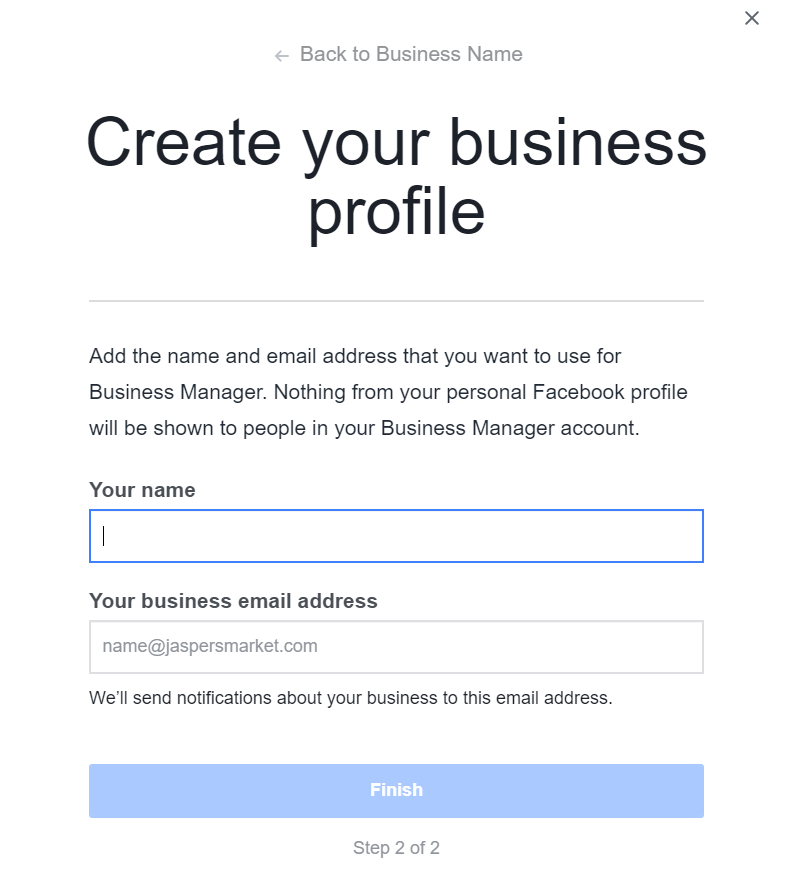
Enter your name and your business email address then click ‘Finish’.
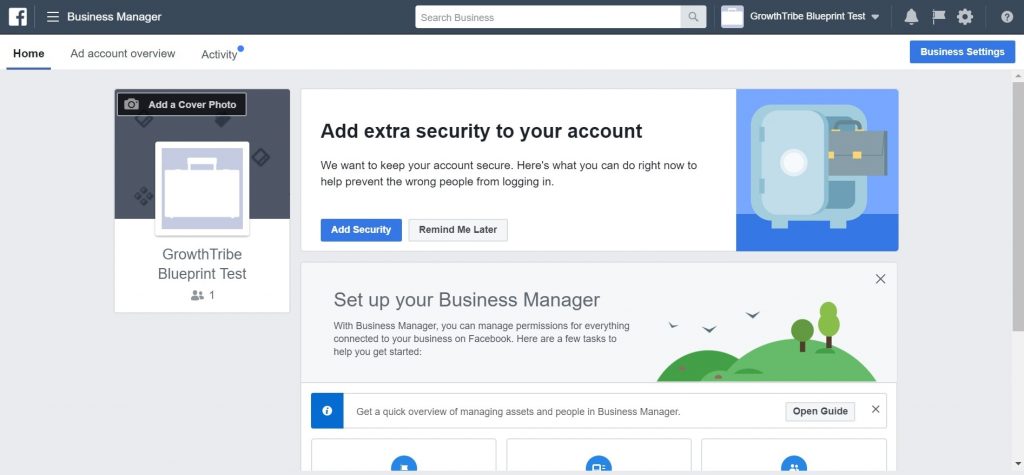
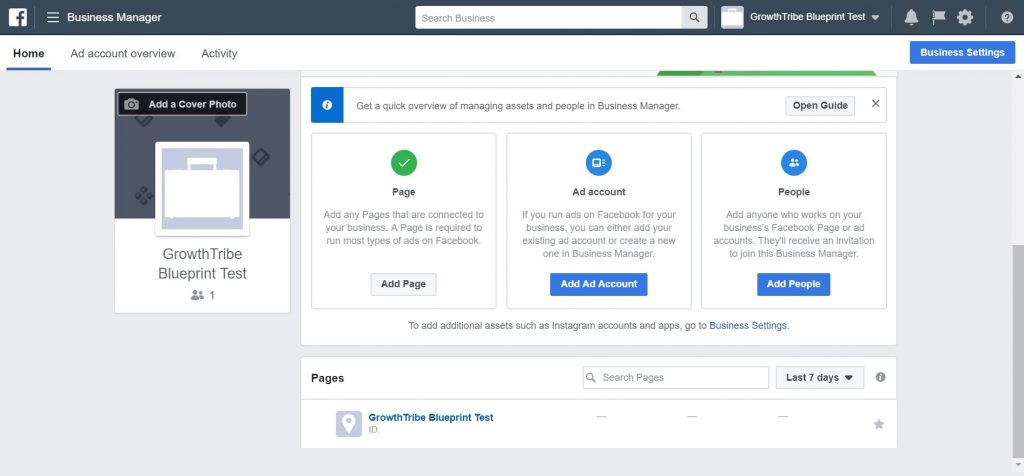
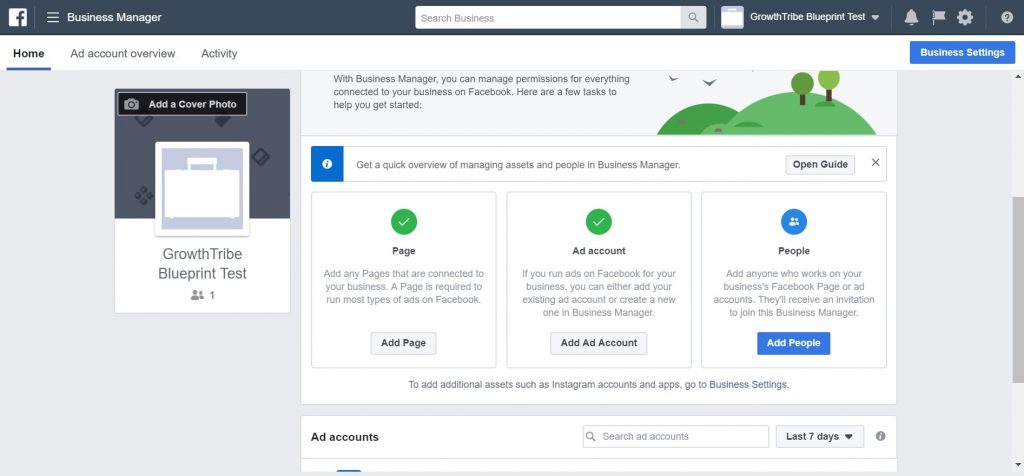
You will see the Business Manager homepage.
On the previous screen, scroll down and click ‘Add Page’. A window will pop out called ‘Add Pages to Business Manager’.

Here, you have 3 choices.
You can add an existing page that you own or create a new one.
On the other hand, if you manage Facebook pages for clients or other businesses, you can request access to add someone else’s page.
Create A New Page
For now, we are going to show you how to create a new page.
Click ‘Create Page’.
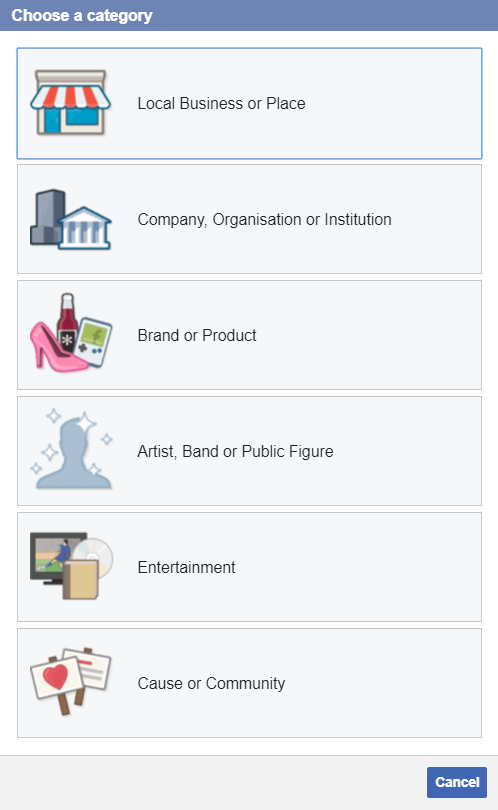
Choose a category that your business belongs to then a window will pop out.
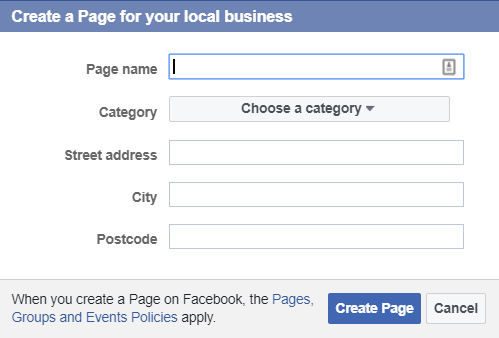
Fill up the details of your business in the respective fields and click ‘Create Page’.
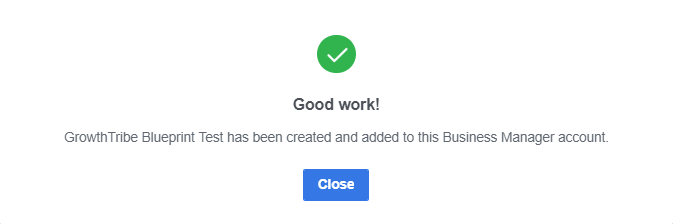
A window will pop up if you are successful in creating your page.
Add A Page You Own
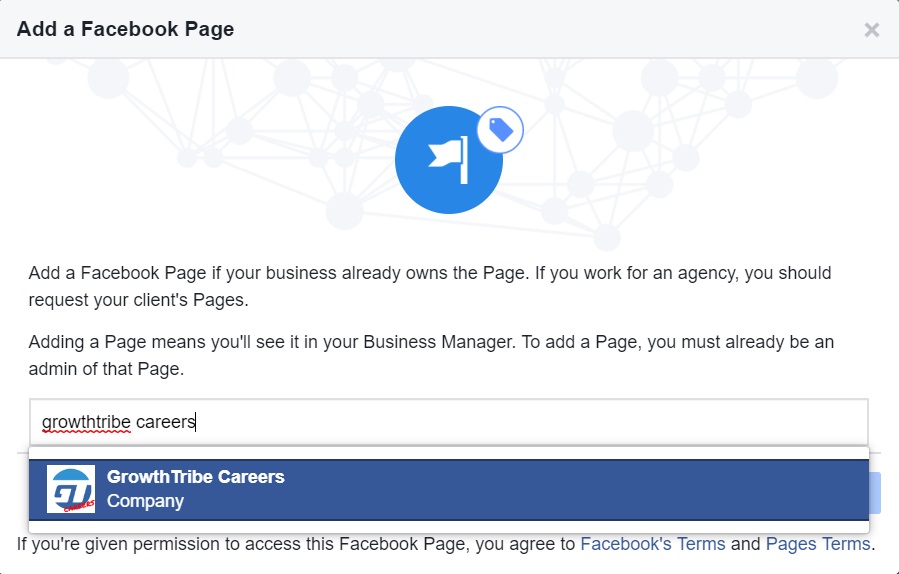
Click ‘Add Page’.
Enter the name of the existing page that you own in the search bar and the page will appear at the drop down menu below it.
(Note: Ensure that you are already an admin of that existing page. If you created the Page then you will automatically be the admin.)
Click the page that you want to add then click ‘Add Page’. A window will pop up if you are successful in adding your page.
Request Access
Click ‘Request Access’.
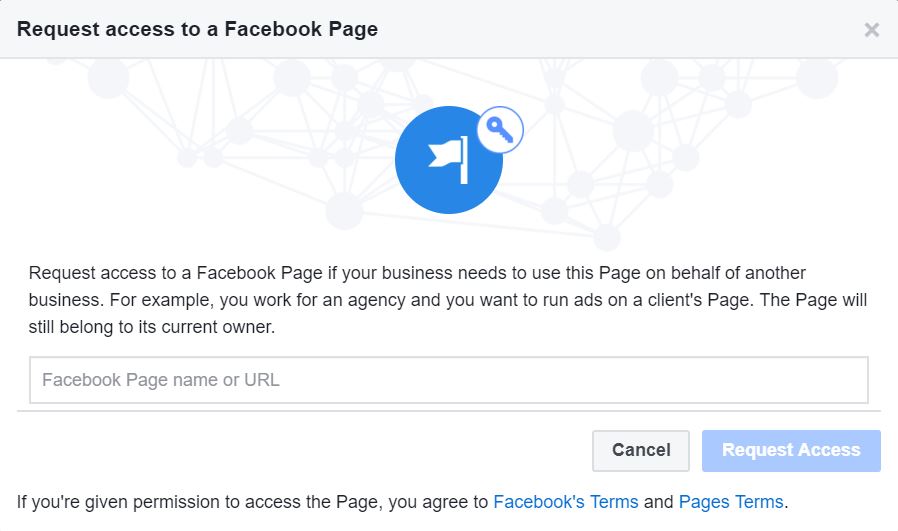
Enter the name of the Facebook Page and click ‘Request Access’. You’ll be prompted to select the role you need for the page.
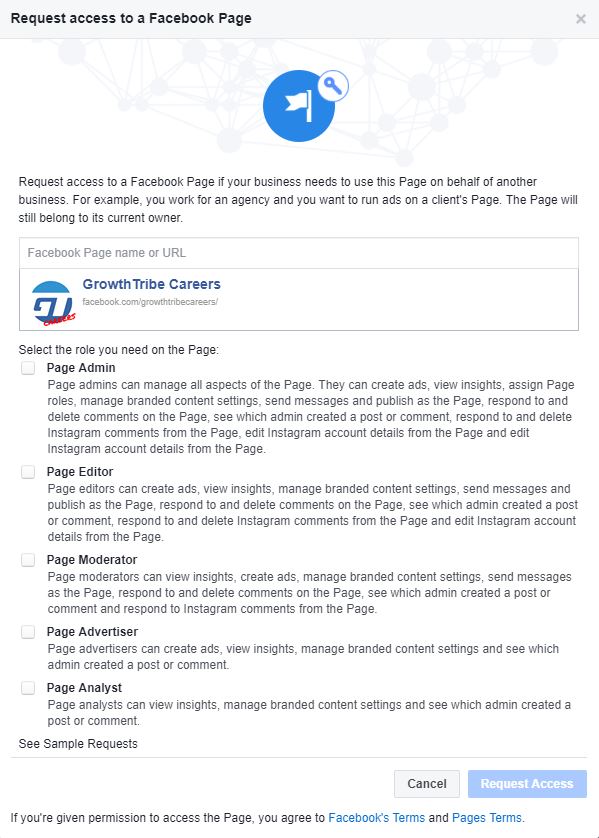
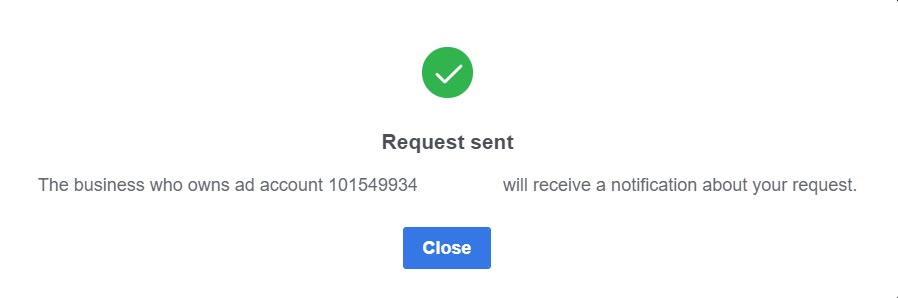
Select the role you need and click ‘Request Access’. You will see a pop out window saying your request has been sent to the owner of the Page successfully.
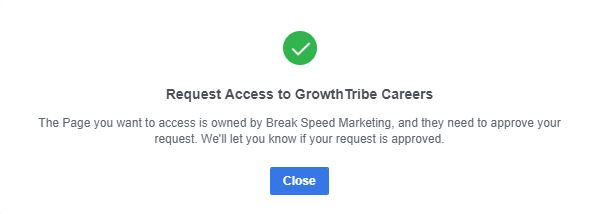
Once the owner approves your request, you will have access to the Facebook page.
Click ‘Add Ad Account’. A window called ‘Add Ad Accounts To Business Manager’ will pop out.
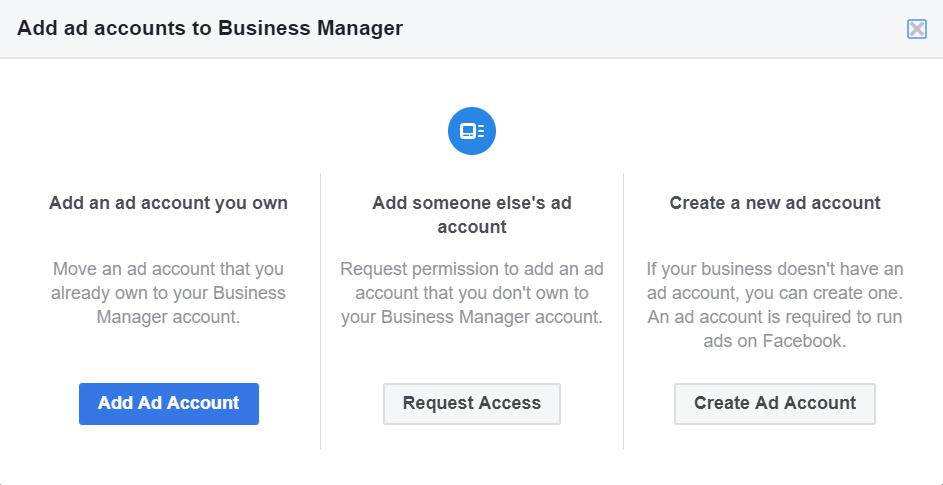
Here, you have 3 choices.
You can add an existing ad account that you own or create a new one.
On the other hand, you can click ‘Request Access’ instead to access a client ad account.
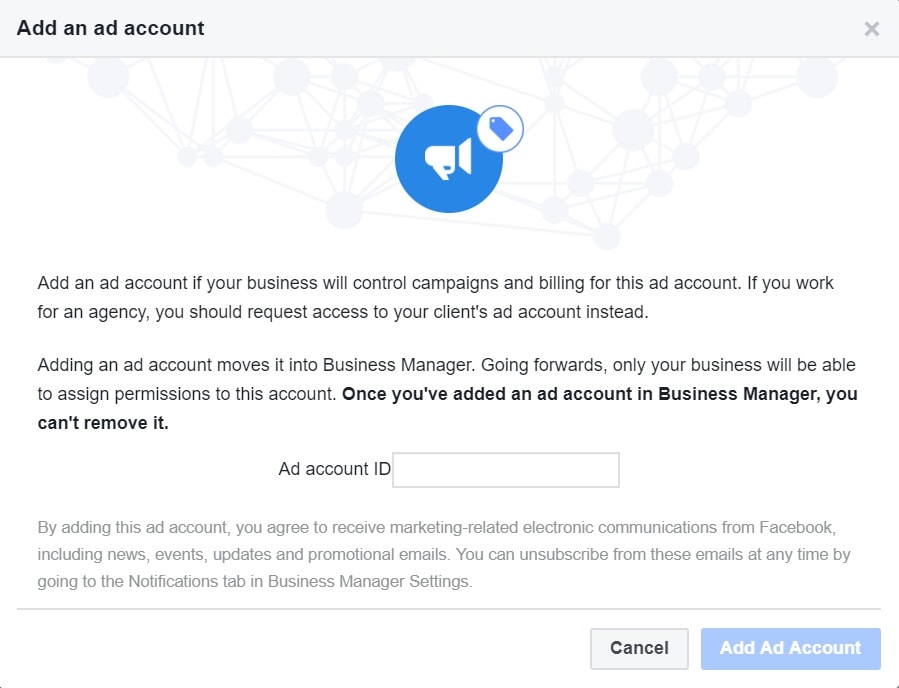
(Note: Once you add your ad account to Facebook Business Manager, you can’t remove it, so it’s especially important that you only add accounts that you own.)
Create A New Ad Account
Click ‘Create Ad Account’. A window will pop out.

Type in the ad account name that you want.
You can also change the currency that you prefer for Facebook to charge you in and the time zone that you are marketing in.
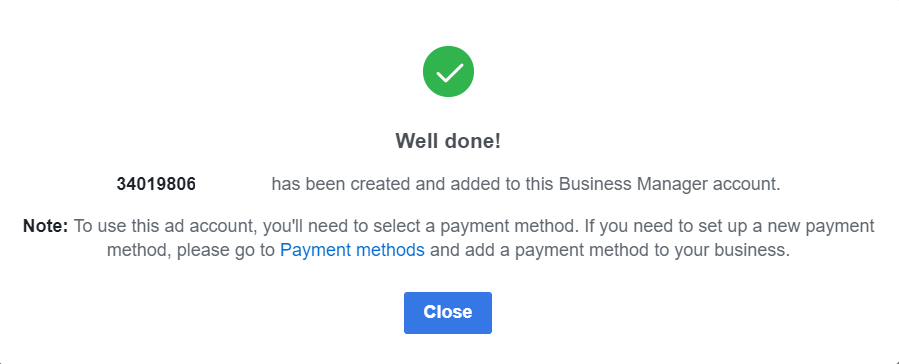
Click ‘Create Ad Account’. You will see a message once you’ve successfully created it.
Add Existing Ad Account
Click ‘Add Ad Account’. Then enter the Account ID of the existing ad account and click ‘Add Ad Account’.
Request Access
Click ‘Request Access’.
Known Ad Account ID
If you know the ad account ID, insert it then assign yourself the role (either admin, advertiser or analyst) that you will be assigned for that ad account.
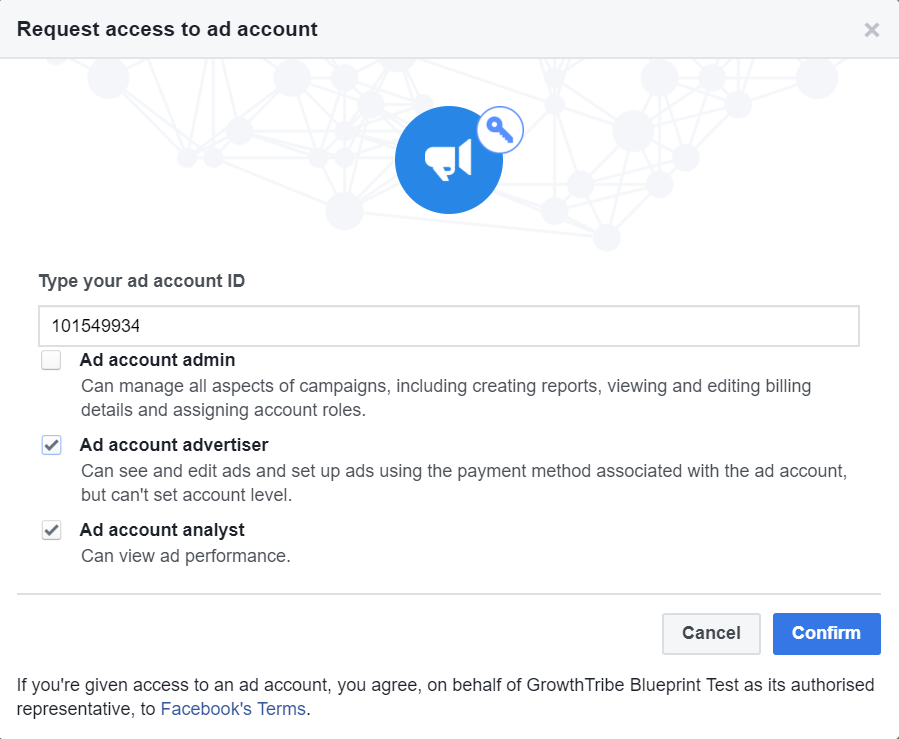
Then click ‘Confirm’. You will be notified that your request has been sent to the owner of that ad account.
You will be notified once your request has been approved.
How Do You Find Your Account ID?
To discover your Account ID, click on ‘Settings’ from your Facebook Business Manager.
You will see your Ad Account ID under the ‘Ad account setup’ section.
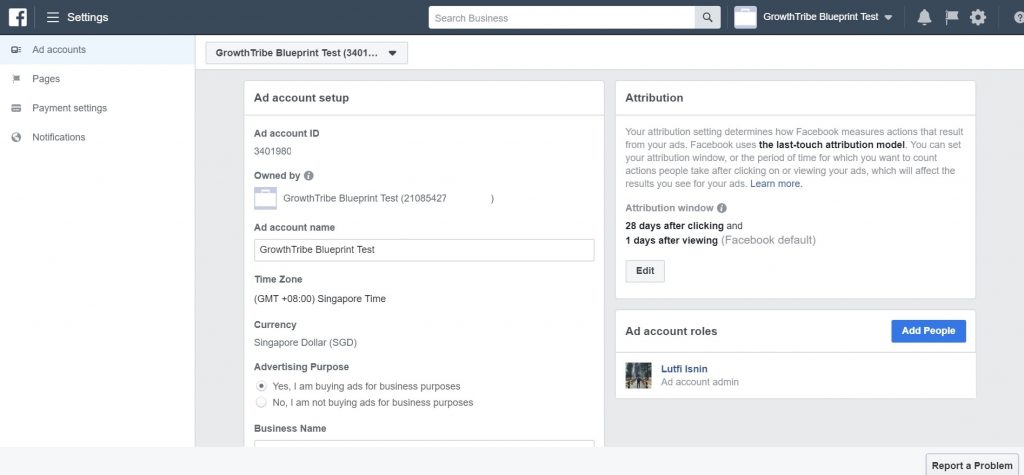
You will need to know your Ad Account ID in cases like when the agency you are working with wants to add themselves to your ad account as mentioned in the ‘Add Partners And Agency’ section above.
What If You Don’t Know Your Ad Account ID?
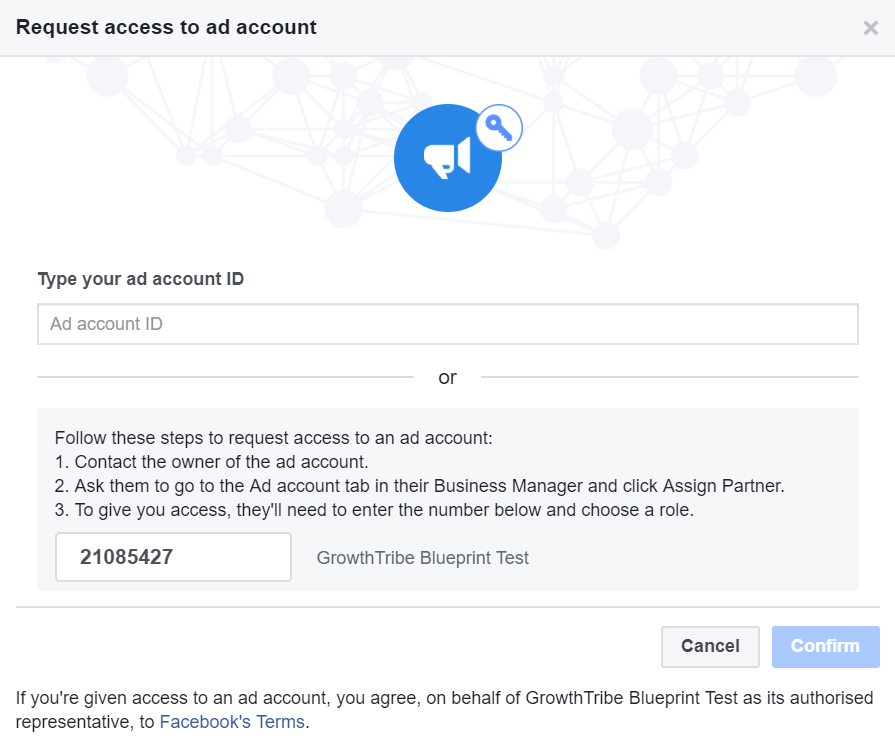
On the other hand, if you didn’t know the ad account id, you’ll have to contact the owner of that account to request access from him.
He’ll have to go to the Ad account tab in his Business Manager Settings and click Assign Partner.
To give you access, he’ll need to enter the number below (in this case, it is 20185427XXXXXXXX) as your account id and choose a role to assign himself to your ad account.
It is good to create multiple ad accounts as back up just in case your primary ad account gets banned by Facebook.
Banning of accounts on Facebook occurs although you may think that you didn’t violate any rules.
When your ad account gets banned, you won’t be able to create a new ad account until your account has been reviewed and approved again.
That’s why we recommend you to set up multiple ad accounts now so you can continue advertising, even if your primary ad account gets banned.
The maximum number of ad accounts you can create is 5.
From your Business Manager dashboard, click on ‘Business Settings’.
Click on ‘Ad Accounts’ on the left side of the page.
Click on ‘Add’ then ‘Create a New Ad Account’.
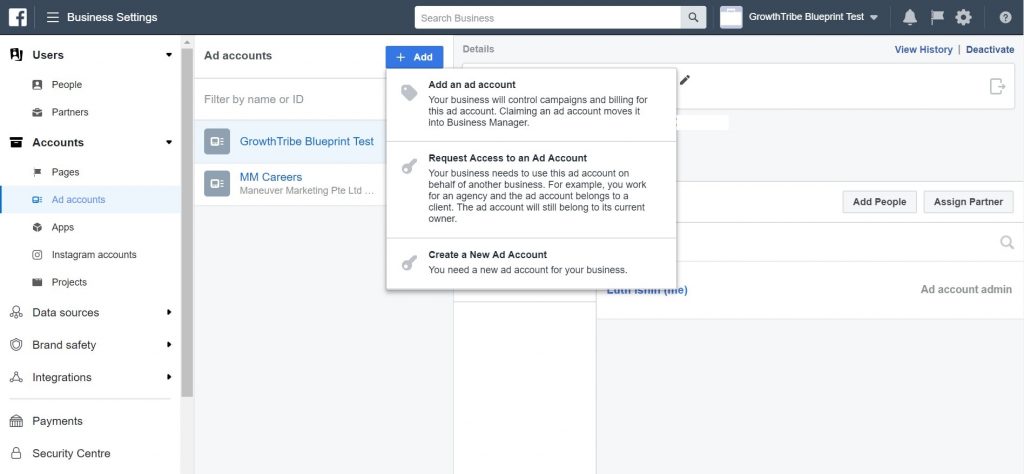
Follow the steps from the ‘Step 1: Create Account’ section above to continue creating your additional ad account.
From your Facebook Business Manager, click on ‘Settings’.
Click on ‘Payment Settings’ at the left hand side.

Click ‘Add Payment Method’ to add a credit/debit card or PayPal account. This will be the card/account that Facebook will charge for your ad spend.
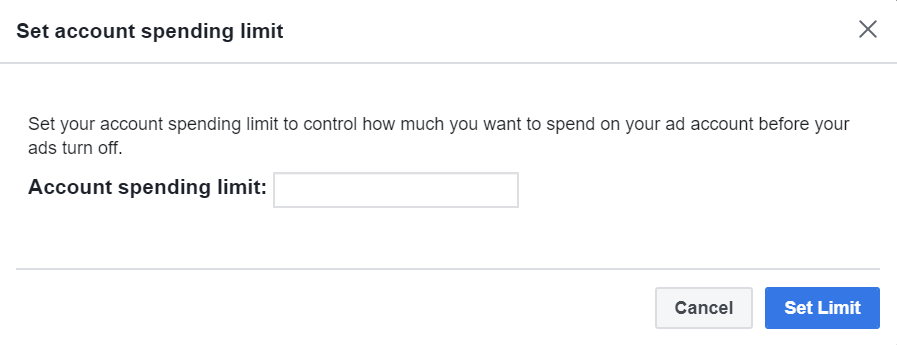
You can also click ‘Set Account Spending Limit’ to control your ad spend. This is a useful function if you forgot to check on your campaign.
Enter the amount that you are comfortable spending and click ‘Set Limit’.
Facebook allows you to give varying degrees of access to different people. This is based on the role (either admin, advertiser or analyst) that you assign to your team member.
Go to the Business Manager homepage.
Click ‘Add People’.

Enter the email addresses of of team members you want to add, excluding an agency or another business.
You can give your team members limited account access by choosing Employee access or full account access by choosing Admin access.
Click ‘Next’. Select the Page(s) and Ad Account(s) that you want them to have access to by clicking the different asset types on the left.
You can also select their role for each asset type that you assign them to.
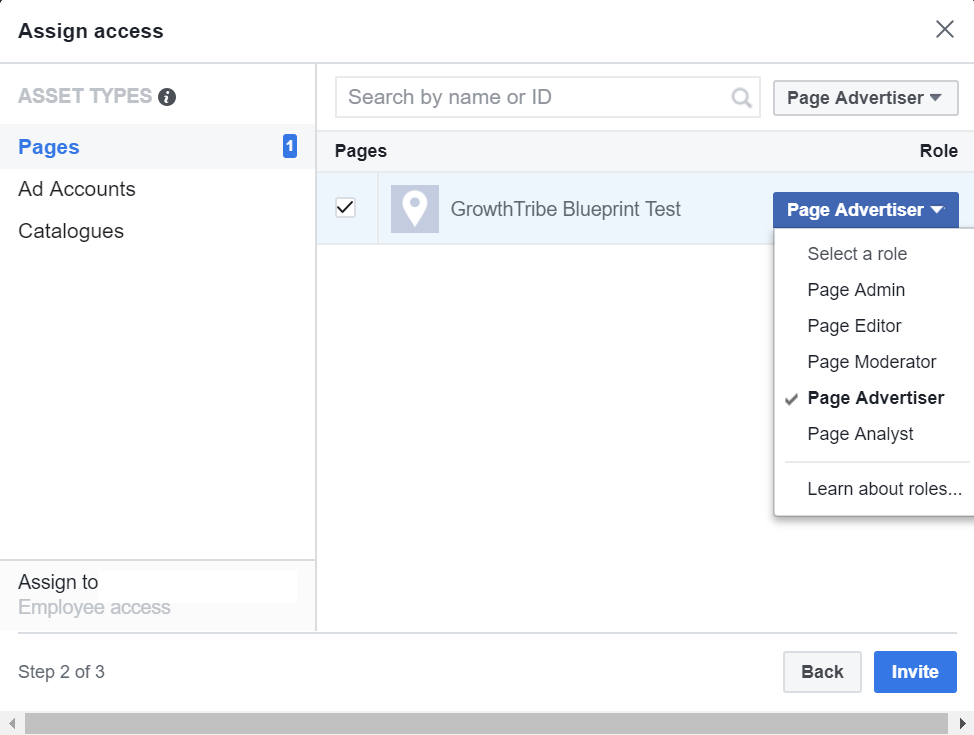
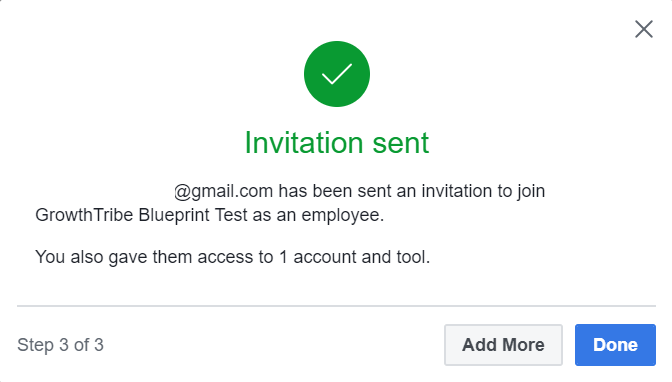
Click ‘Invite’. A window will pop out to show that the invitation has been sent to your team member.
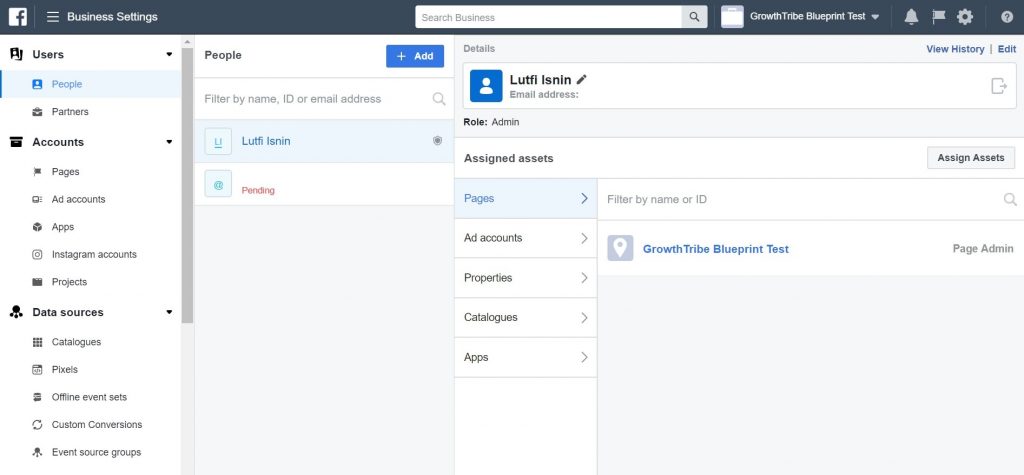
Your team member will receive the notification in his email like the one below:
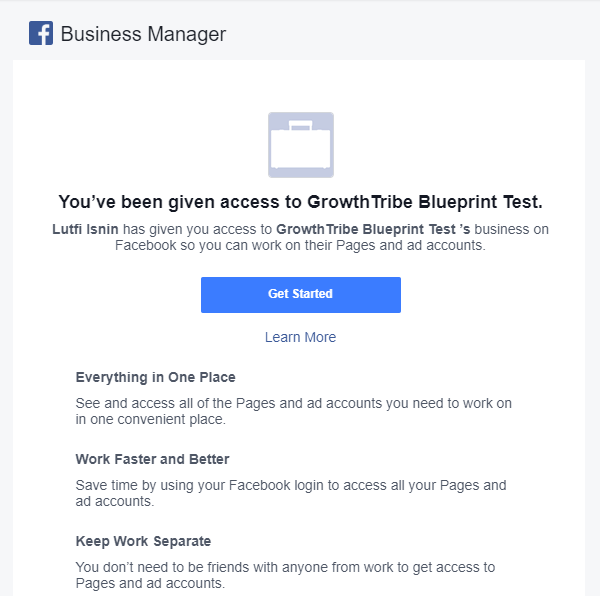
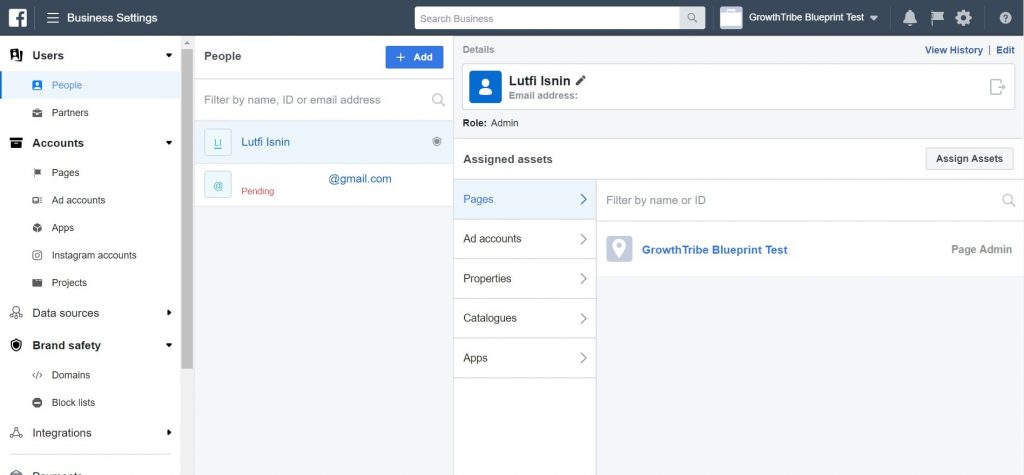
Once your team member accept your invitation, he’ll have access to the assets that you gave him permission to.
Introduction
Facebook pixel is an analytics tool. It allows you to measure the effectiveness of your advertising by understanding the actions people take on your website.
It is a piece of javascript code that is place on your website.The block of code is the same for all advertisers.
The only difference is the ‘Facebook Pixel ID’ that is unique to your ad account.
You should set up your Facebook pixel now although you may not be setting up your Facebook campaign yet.
This is because the pixel can still start collecting data now. So by the time you launch your first campaign, you can start using the information immediately.
To learn how to set up your first Facebook campaign, you can read our ‘How To Launch Your First Facebook Lead Generation Campaign’ blueprint.
Set Up Facebook Pixel
From your Business Manager dashboard, click ‘Business Settings’.
On the left side, under the ‘Data Sources’ header, click ‘Pixels’. Then click ‘Add’.
![]()
You can change the name of your pixel or stick with the one that is auto-generated. For example, in our case is ‘GrowthTribe Blueprint Test’s pixel’.
![]()
Click ‘Create’.
You’ll see the pixel once you’re successfully created it.
![]()
How To Use Business Manager To Improve Your Ad Performance
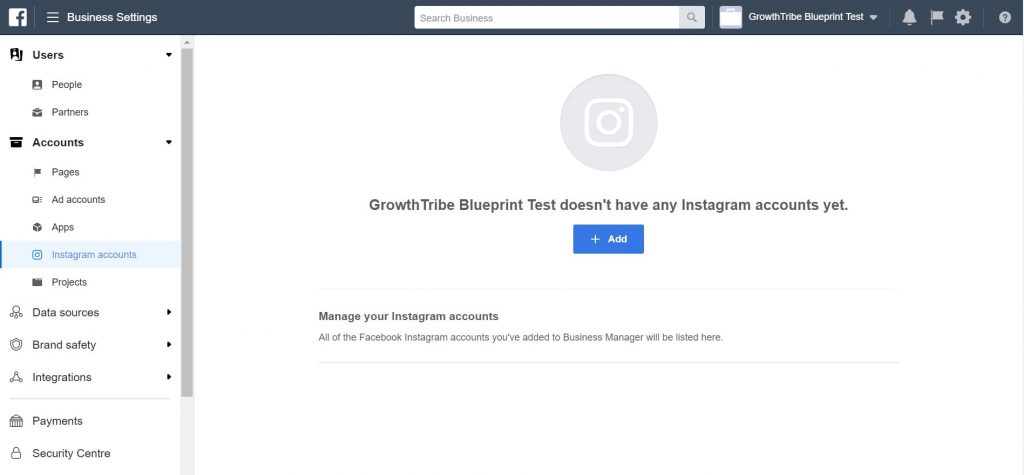
You can also connect your Instagram account to Facebook Business Manager.
Select ‘Instagram accounts’ on the left side of the page after clicking ‘Business Settings’ on the Business Manager dashboard.
Click ‘Add’ if you have any Instagram account for your business.
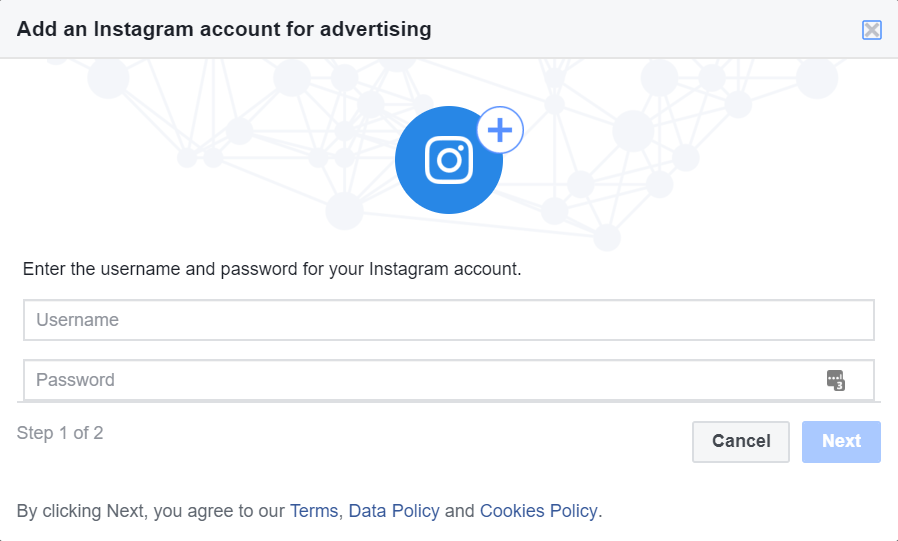
Enter the account details of your Instagram account and click ‘Next’.
Select the ad account that you want to assign the Instagram account to and click ‘Next’.
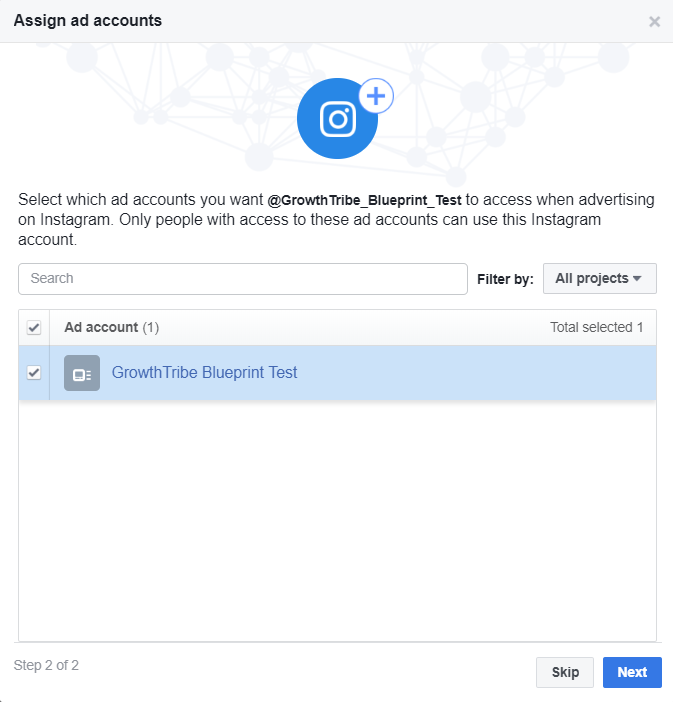
You will see a pop out that confirms your Instagram account was added successfully.
If you have an agency that is helping you to run ads on Facebook, you can give them access to your ad account and page.
By doing it this way, the agency will have rights to add their own team members to have access to your assets.
To do this, click on ‘Business Manager’ and you will see the Business Manager dashboard.
Click on ‘Business Settings’ under the ‘Settings’ header.
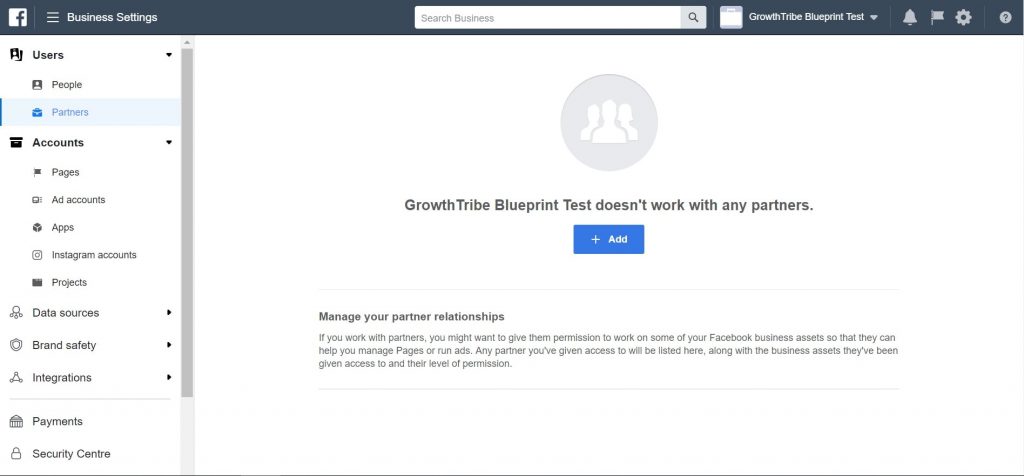
You will see ‘Partners’ on the left hand side of the page, so click on it.
You will see the option of adding a partner:
Click on ‘Add’ then you will be prompted to enter the ‘Partner Business ID’, which you can get from the agency that you are working with.
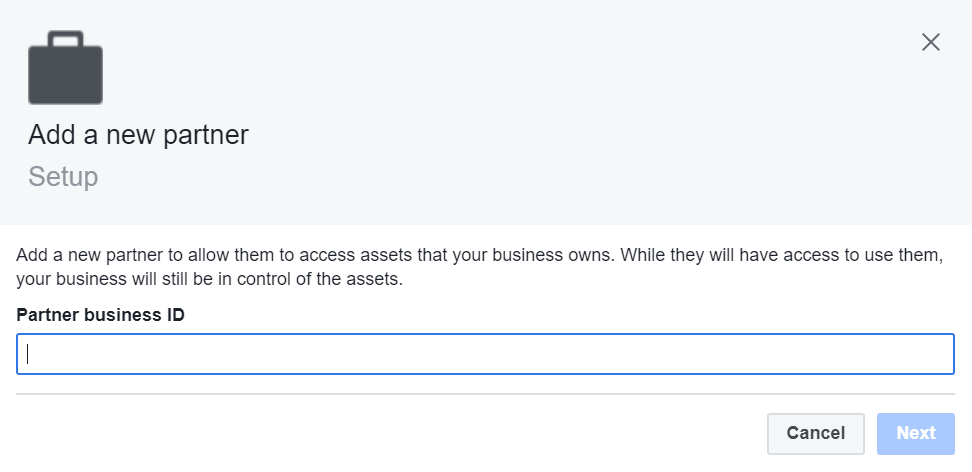
Enter your agency’s ‘Partner Business ID’ and click ‘Next’.
Just like how you add people in the section above, you can select the Page(s) and Ad Account(s) that you want the agency to have access to by clicking the different asset types on the left.
You can also select their role for each asset type that you assign them to.
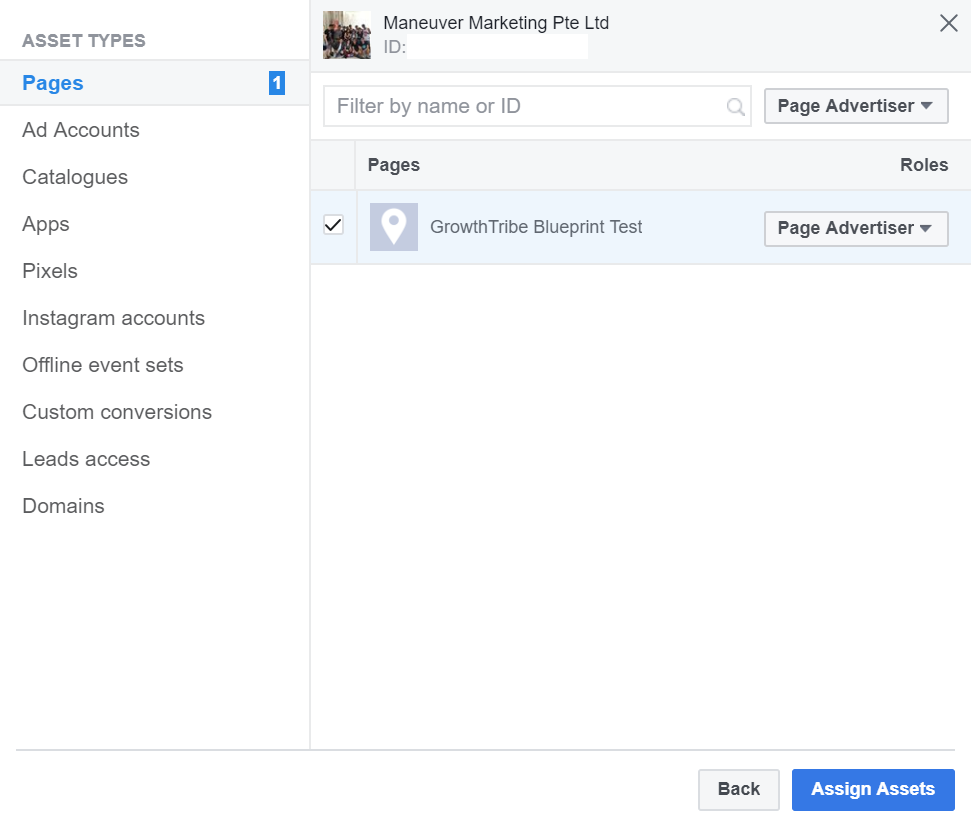
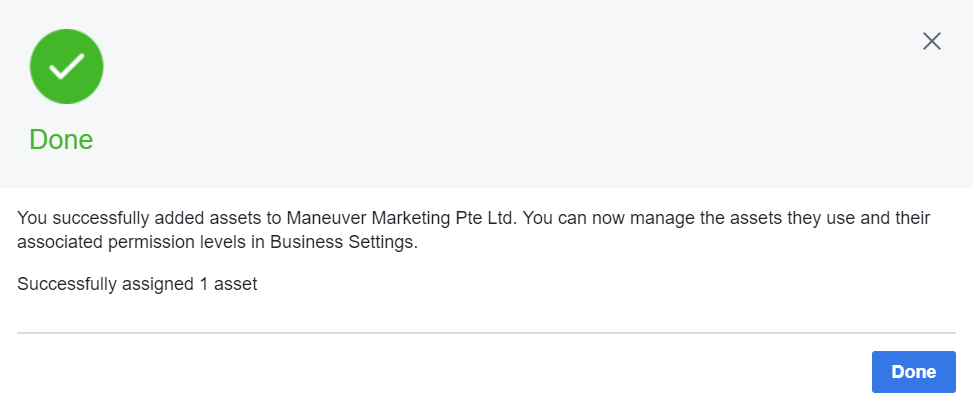
Click ‘Assign Assets’. You see a pop up once you’ve successfully assigned the agency the assets.
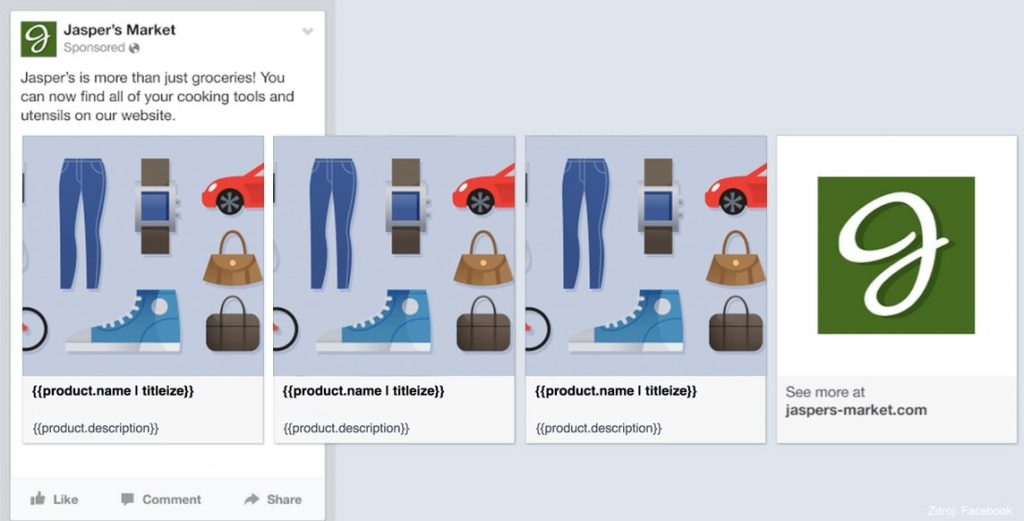
The main reason you want to use the Product Catalog tool is to create dynamic ads.
These are ads that are populated with data from your Catalog based on your customer’s behaviour. For example, if they visited a product page or a product catalog page for “sweaters”, you can re-target them with ads related to sweaters.
This is especially useful for e-commerce stores with hundreds of products and thousands of visitors on their sites everyday.
We’ll be covering more about dynamic ads in future blueprints.
(Credit: Facebook)
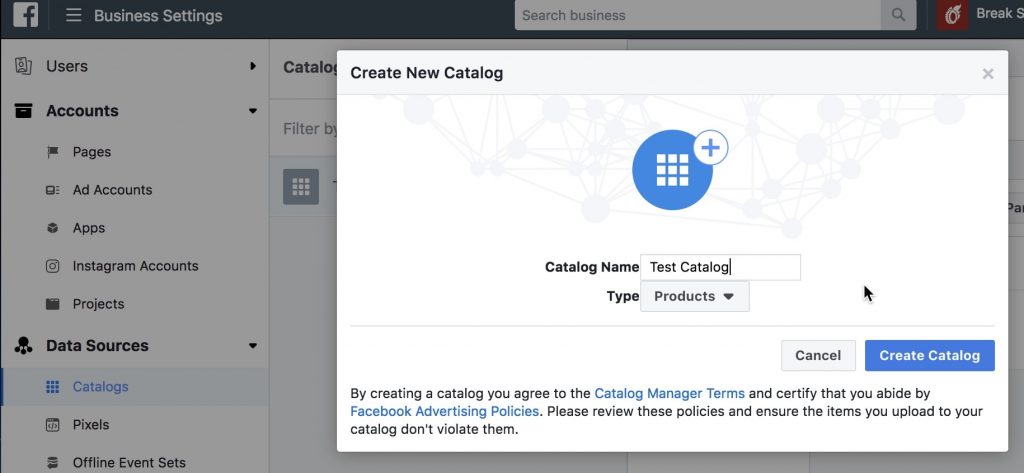
Create A Product Catalog
Click on ‘Catalogs’ under ‘Data Sources’ to create your new catalog.
Give your new catalog a name and go through the steps to create your first catalog.
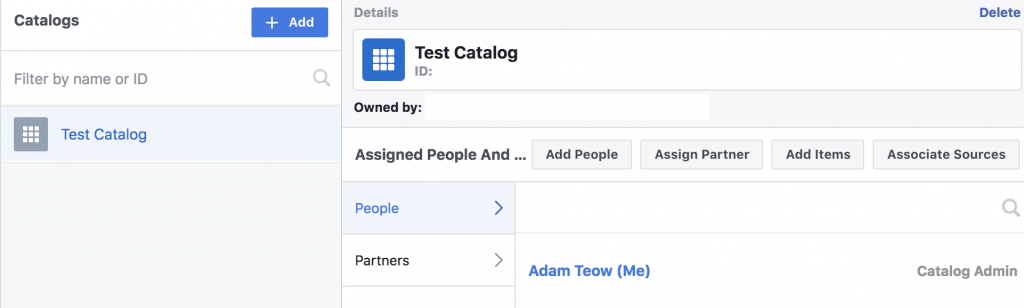
Once you’re done, you’ll see the product catalog below. You can now ‘Add Items’ and Product Feeds.
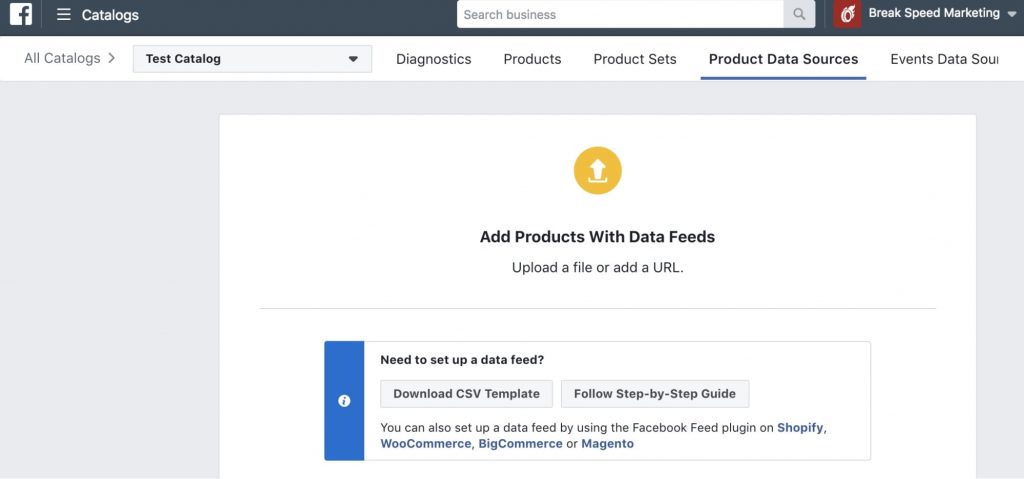
Setup The Product Feed
There are many ways to setup your product feed.
Depending on the platform you’re using, you can follow the instructions provided.
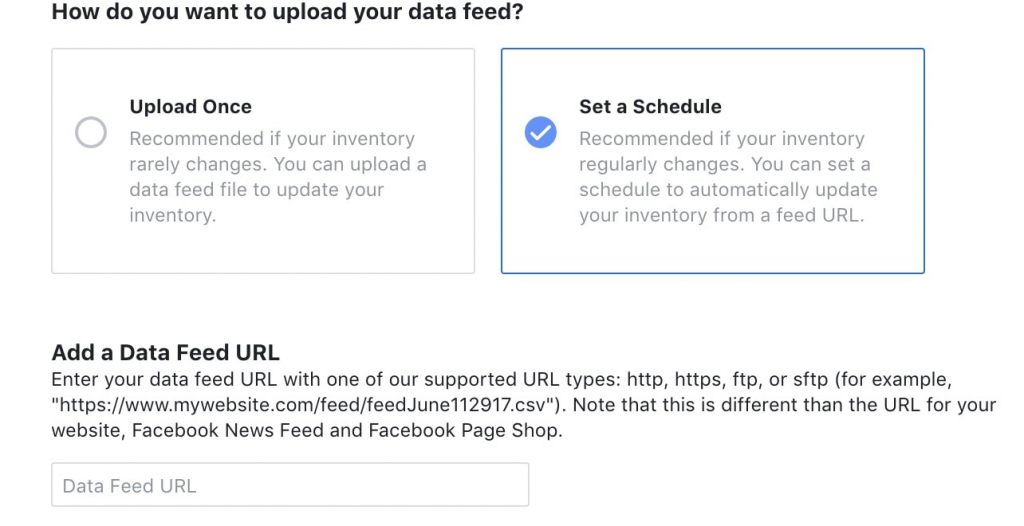
I recommend you setup a schedule to update at least once a day so you can promote existing inventory.
Introduction
This is a useful feature for you to group multiple business assets together – such as Pages, ad accounts, product sets, apps and even Instagram accounts.
You can think of Projects as folders for Facebook Business Manager.
Then you can manage and assign assets to other users while keeping them separate.
This means that you don’t have to go through the entire process above again, just to ensure that your team member only has rights to certain assets that they need for a particular project.
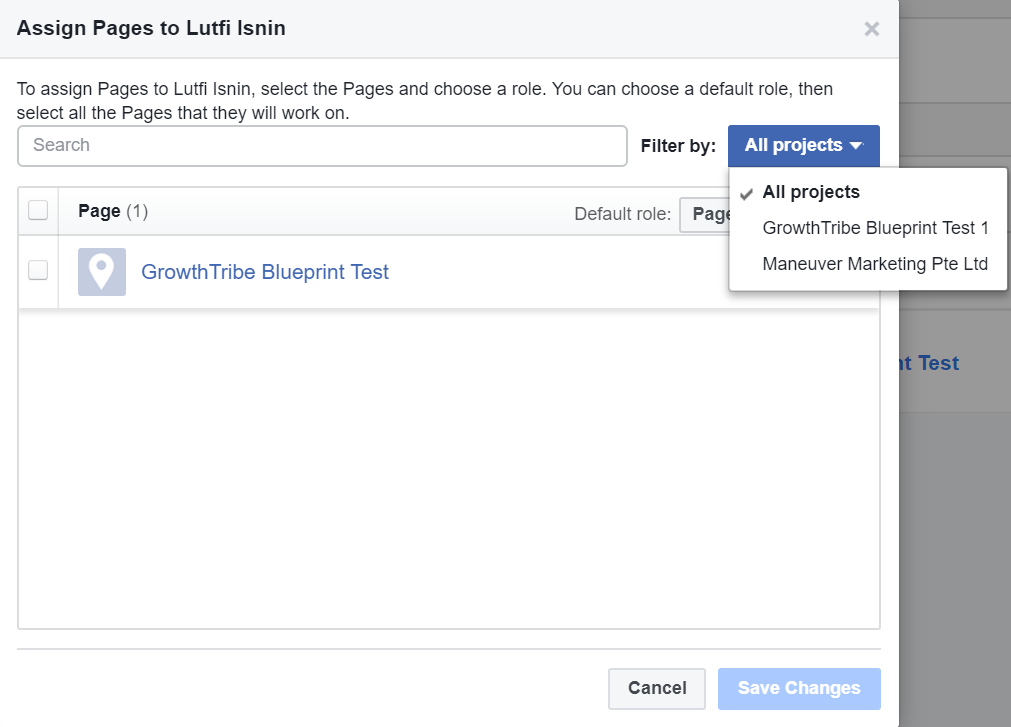
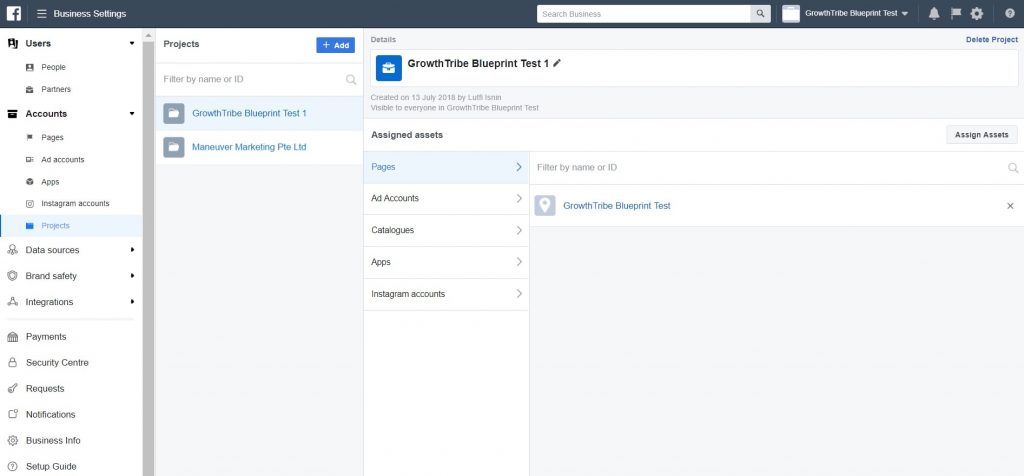
In the future, you can filter by project when assigning assets to new team members as you can see in the image below:
Another way you can use this feature is to categorise your business into different segments. So each project will represent a particular division.
On the other hand, if your business caters to markets in different countries, each project can represent a country.
By doing this, you can monitor the ad performances and data for each project more clearly and easily. This allows you to manage your projects more efficiently and make better strategic decisions.
Create A Project
From Business Manager dashboard, click on ‘Business Settings’.
Click on ‘Projects’ on the left.
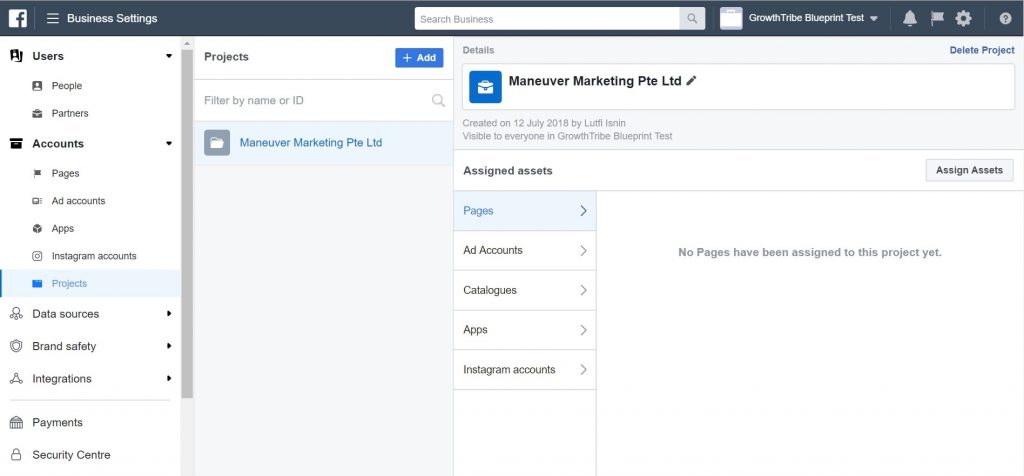
Click on ‘Add’. A window will pop out to ‘Create new project’.
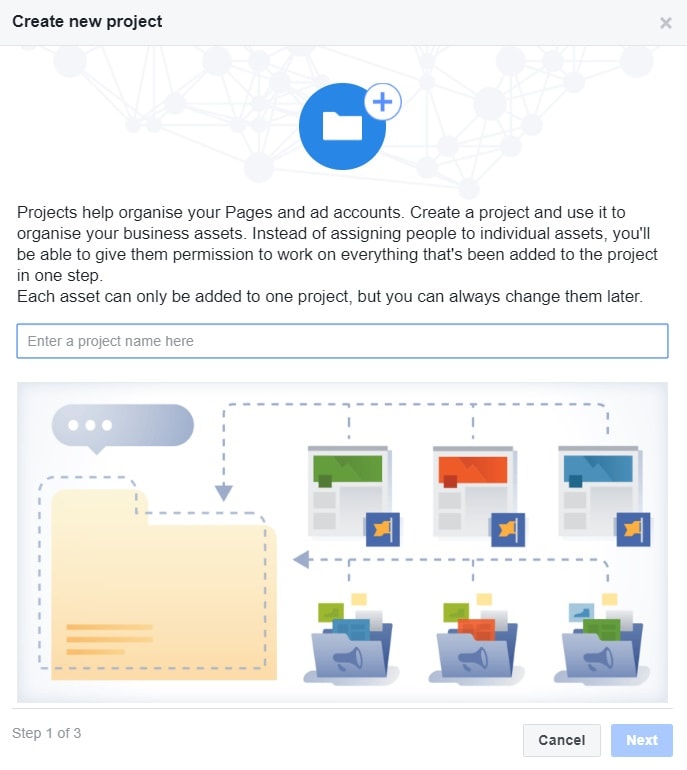
Enter a project name then click ‘Next’.
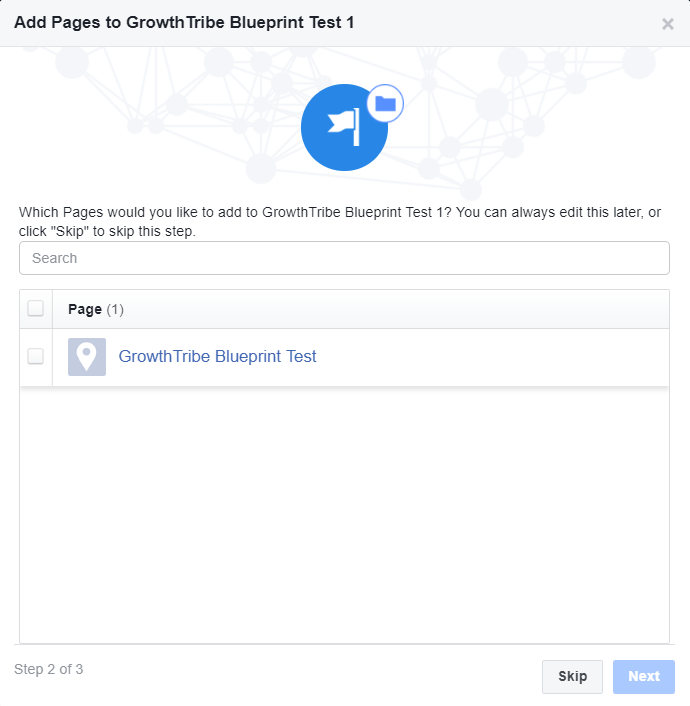
If you have multiple pages, select the page that you want to assign to a project.
Take note that one asset can only be added to one project. So if you need to assign the same asset to another project, you will have to move it from one project to another.
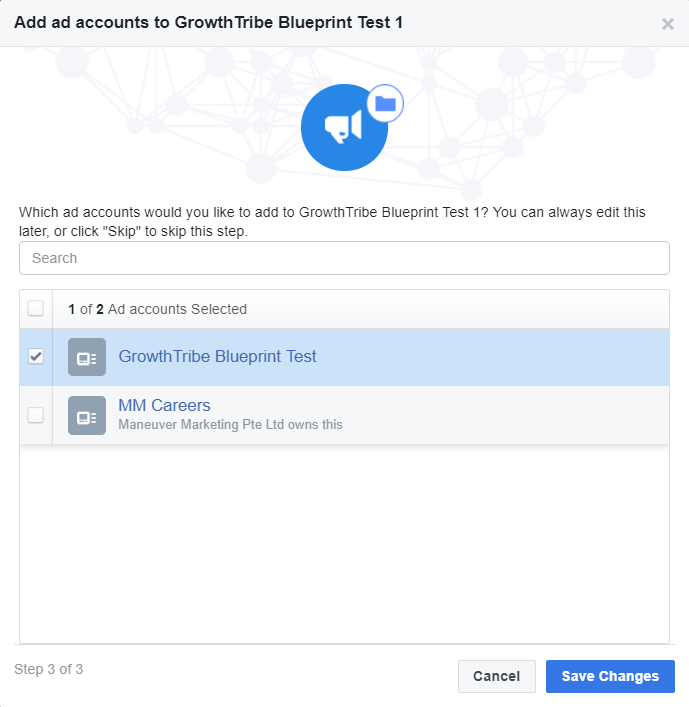
Click ‘Next’.
If you have multiple ad accounts, select the account that you want to assign to a project.
Click ‘Save Changes’.
You will see the project added to the list of Projects.
As mentioned previously, Facebook Pixel is a useful tool that helps you to collect data about the actions people take on your website.
For example, you have 2 ad accounts selling 2 related products, say baby milk powder and baby clothes, and each product has their own ad account and landing pages.
Let’s say you are making more sales for the baby milk powder.
The customers buying this are also likely to buy baby clothes too.
By sharing the baby milk powder pixel to the baby clothes ad account and landing page, you will be able to get better quality traffic and increase sales for your baby clothes too.
Here’s how you can share a Facebook pixel across different ad accounts.
From your Facebook Business Manager, click on ‘Business Settings’.
Click on ‘Pixels’ on the left side.
![]()
Select the Facebook pixel that you want to share and click on ‘Assign Ad Accounts’.
![]()
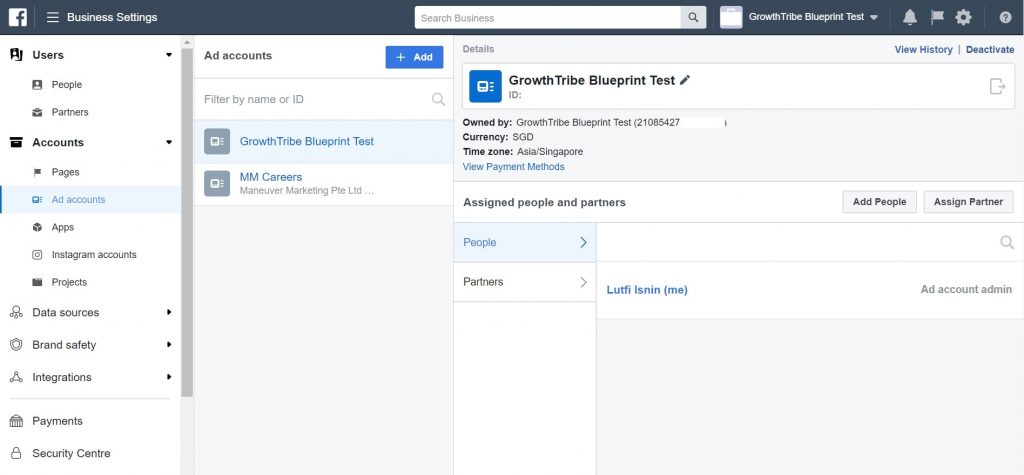
You will see a list of ad accounts that you have access to.
Select the ad account that you want to share the Facebook pixel to.
In our case, we are sharing the GrowthTribe Blueprint Test’s pixel to MM Careers.
Click ‘Save Changes’.
![]()
As you can see, the pixel has been shared with the MM Careers ad account.
You will now be able set up that pixel for the landing page that MM Careers ad account redirects viewers to.
You can also use the pixel to create an audience or conversion off of that pixel for targeting purposes in a campaign in the MM Careers ad account.
We’ll discuss more on how you can use the Facebook pixel in your campaigns in another blueprint in the future.
For this section, we’ll continue with the example above on baby milk powder and baby clothes.
Again, let’s assume the baby milk powder campaign is performing better.
Besides sharing pixels, you can also share audiences to improve the results of the baby clothes campaign.
For example, you can create a Custom Audience of people who bought the baby milk powder.
You can share this audience with the baby clothes ad account.
Now you can retarget this audience with ads for baby clothes since this group of people bought milk powder before so is more likely to buy baby clothes too.
Here’s how you can share an audience from one ad account to another.
From your Facebook Business Manager, click on ‘Audiences’ under the ‘Assets’ header.

Check the box beside the audience that you want to share.
Click ‘Actions’ then click ‘Share’.
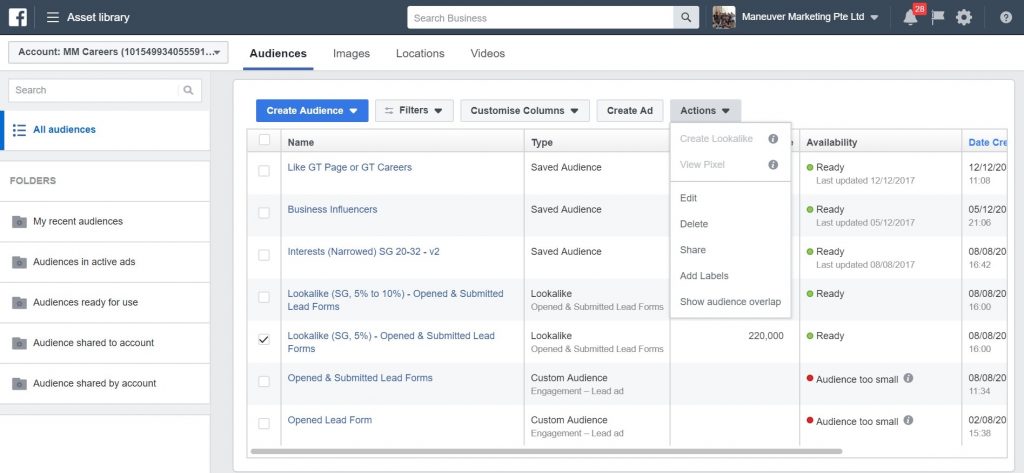
You’ll be prompted to enter the Ad Account ID of the account that you want to share the audience with.
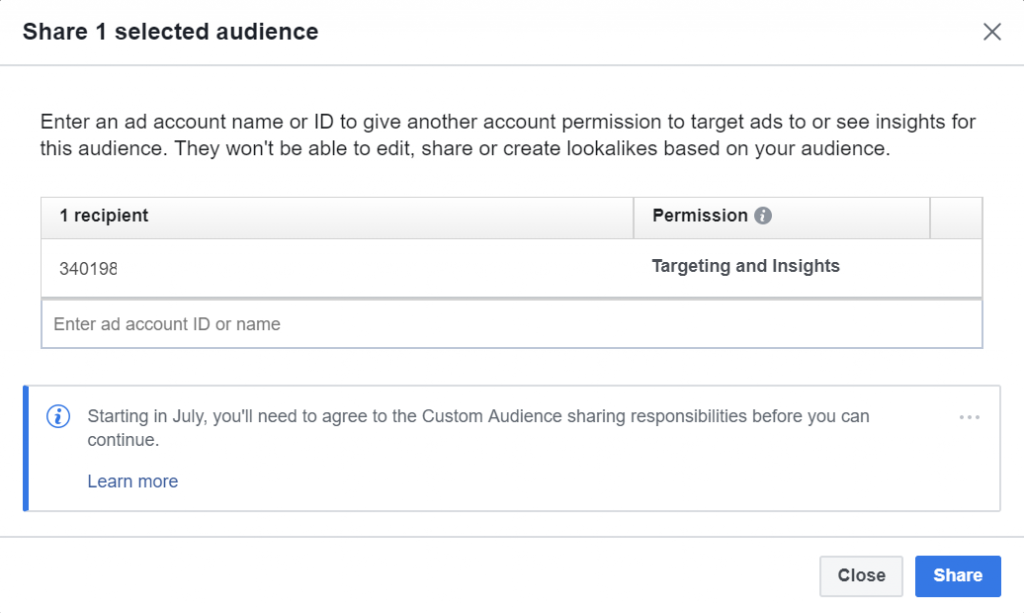
Click ‘Share’.
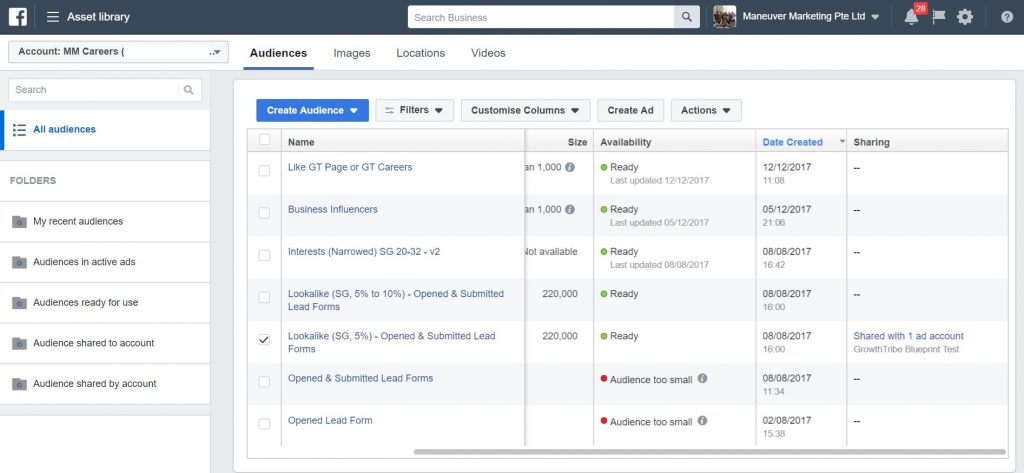
As you can see, the ‘Lookalike (SG, 5%) – Opened & Submitted Lead Forms’ audience has been shared with GrowthTribe Blueprint Test ad account.
You can learn more about how to use audiences in our ‘Facebook Laser Targeting Guide’ blueprint.
Introduction
Brand safety is how you can prevent your ads from delivering within or alongside content that is not aligned to your brand.
One of the ways to do this is by using block lists.
A block list prevents your ads from running on specific websites and apps within the Audience Network, eligible videos of Pages included in the Facebook in-stream placement and specific publishers for the Instant Articles placement.
This prevents you from wasting ad budget being spent on platforms that have been blacklisted.
Uploading Block List
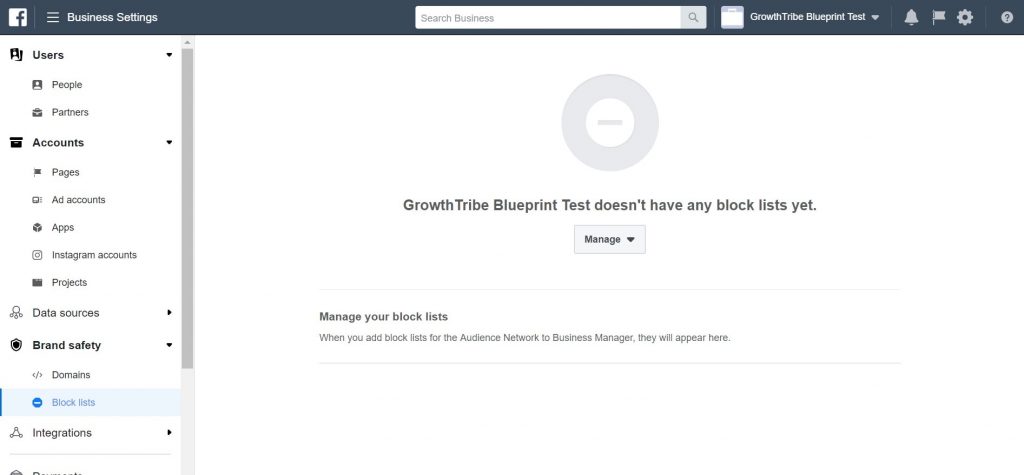
From your Facebook Business Manager, click on ‘Business Settings’.
Click on ‘Brand Safety’ then click on ‘Block lists’.
Click on ‘Manage’.
You’ll see an option to ‘Add and edit block lists’.
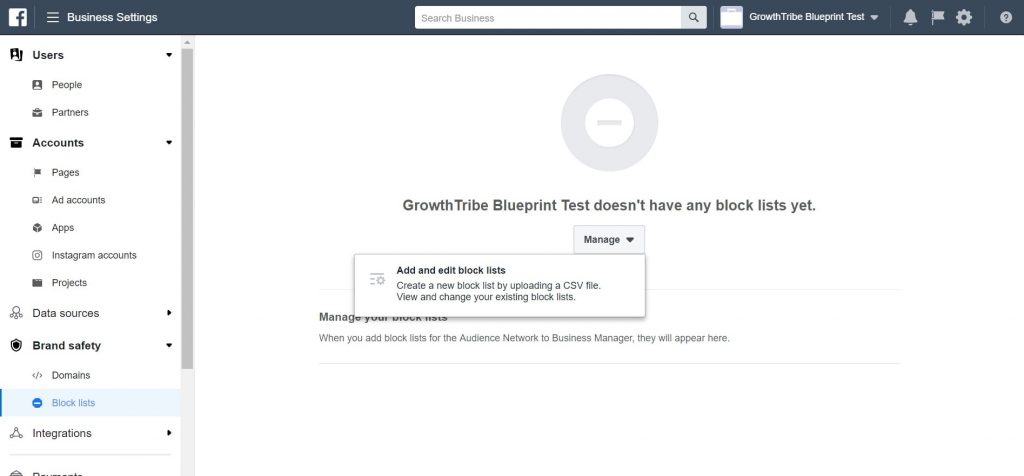
Click on ‘Add and edit block lists’.
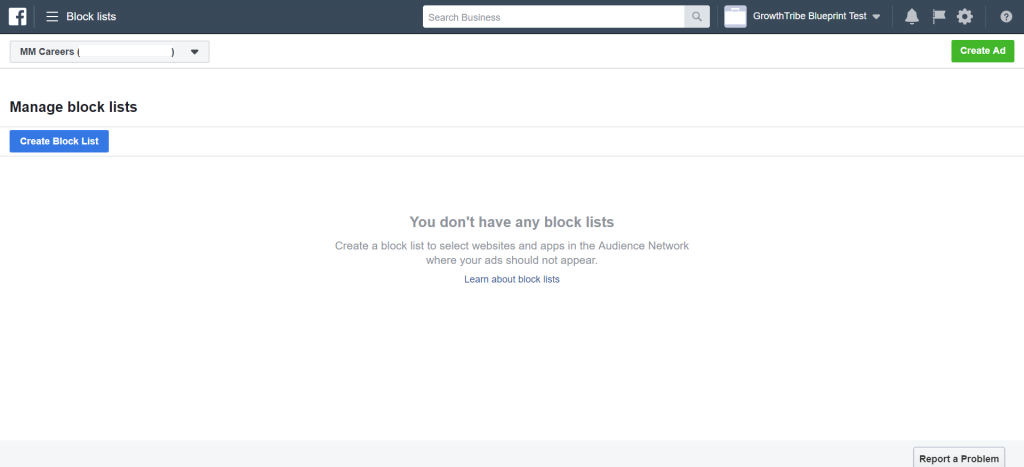
You can upload your block lists here. Ensure that the Excel file you are uploading is in CSV format.
Facebook actually provides a list that you can use. You can find it here: https://www.facebook.com/business/help/1382467665184382?helpref=faq_content
What’s Next?
Congratulations! You now know more about business manager than 90% of the advertisers online.
If you want to learn about to set up and launch your first Facebook campaign, you can check out our blueprint: ‘How To Launch Your First Facebook Lead Generation Campaign’.
You can also check out our ‘How To Create Facebook Ads That Sell’ blueprint to learn how to write high converting ads for your campaign.